> ## Documentation Index
> Fetch the complete documentation index at: https://help.weavely.ai/llms.txt
> Use this file to discover all available pages before exploring further.
# How to Create and Apply a Custom Form Theme
> Create a reusable branded theme and apply it automatically to every new form, no redesigning from scratch each time.
{`{
"@context": "https://schema.org",
"@graph": [
{
"@type": "WebPage",
"@id": "https://help.weavely.ai/get-started/theme-editor",
"url": "https://help.weavely.ai/get-started/theme-editor",
"name": "How to Create and Apply a Custom Form Theme",
"description": "Create a reusable branded theme and apply it automatically to every new form, no redesigning from scratch each time.",
"inLanguage": "en",
"publisher": { "@id": "https://www.weavely.ai/#org" }
},
{
"@type": "TechArticle",
"@id": "https://help.weavely.ai/get-started/theme-editor#article",
"headline": "How to Create and Apply a Custom Form Theme",
"description": "Create a reusable branded theme and apply it automatically to every new form, no redesigning from scratch each time.",
"inLanguage": "en",
"mainEntityOfPage": { "@id": "https://help.weavely.ai/get-started/theme-editor" },
"author": { "@id": "https://www.weavely.ai/#org" },
"publisher": { "@id": "https://www.weavely.ai/#org" }
},
{
"@type": "VideoObject",
"@id": "https://help.weavely.ai/get-started/theme-editor#video",
"name": "How to Create a Custom Form Theme in Weavely AI (Brand Your Forms in Minutes)",
"description": "In this tutorial, I'll show you how to use Weavely's Theme Editor to create a reusable form theme, so every new form automatically matches your brand. No more manually adjusting colors, fonts, and logos form by form. You'll learn how to import your brand from any website URL, customize your form design (colors, typography, button style, layout), and set a default theme so all new forms are instantly on-brand.",
"url": "https://youtu.be/maR9m9a5rWw",
"contentUrl": "https://youtu.be/maR9m9a5rWw",
"embedUrl": "https://www.youtube.com/embed/maR9m9a5rWw",
"duration": "PT3M1S",
"uploadDate": "2026-03-07T00:00:00+00:00",
"thumbnailUrl": [
"https://img.youtube.com/vi/maR9m9a5rWw/maxresdefault.jpg"
],
"publisher": { "@id": "https://www.weavely.ai/#org" },
"potentialAction": {
"@type": "WatchAction",
"target": "https://youtu.be/maR9m9a5rWw"
}
},
{
"@type": "Organization",
"@id": "https://www.weavely.ai/#org",
"name": "Weavely",
"url": "https://www.weavely.ai"
}
]
}`}
The Theme Editor lets you define your brand's colors, fonts, logo, and layout once, then apply that style to every form you create. It's the fastest way to keep all your forms looking consistent without touching each one individually.
## Opening the Theme Editor
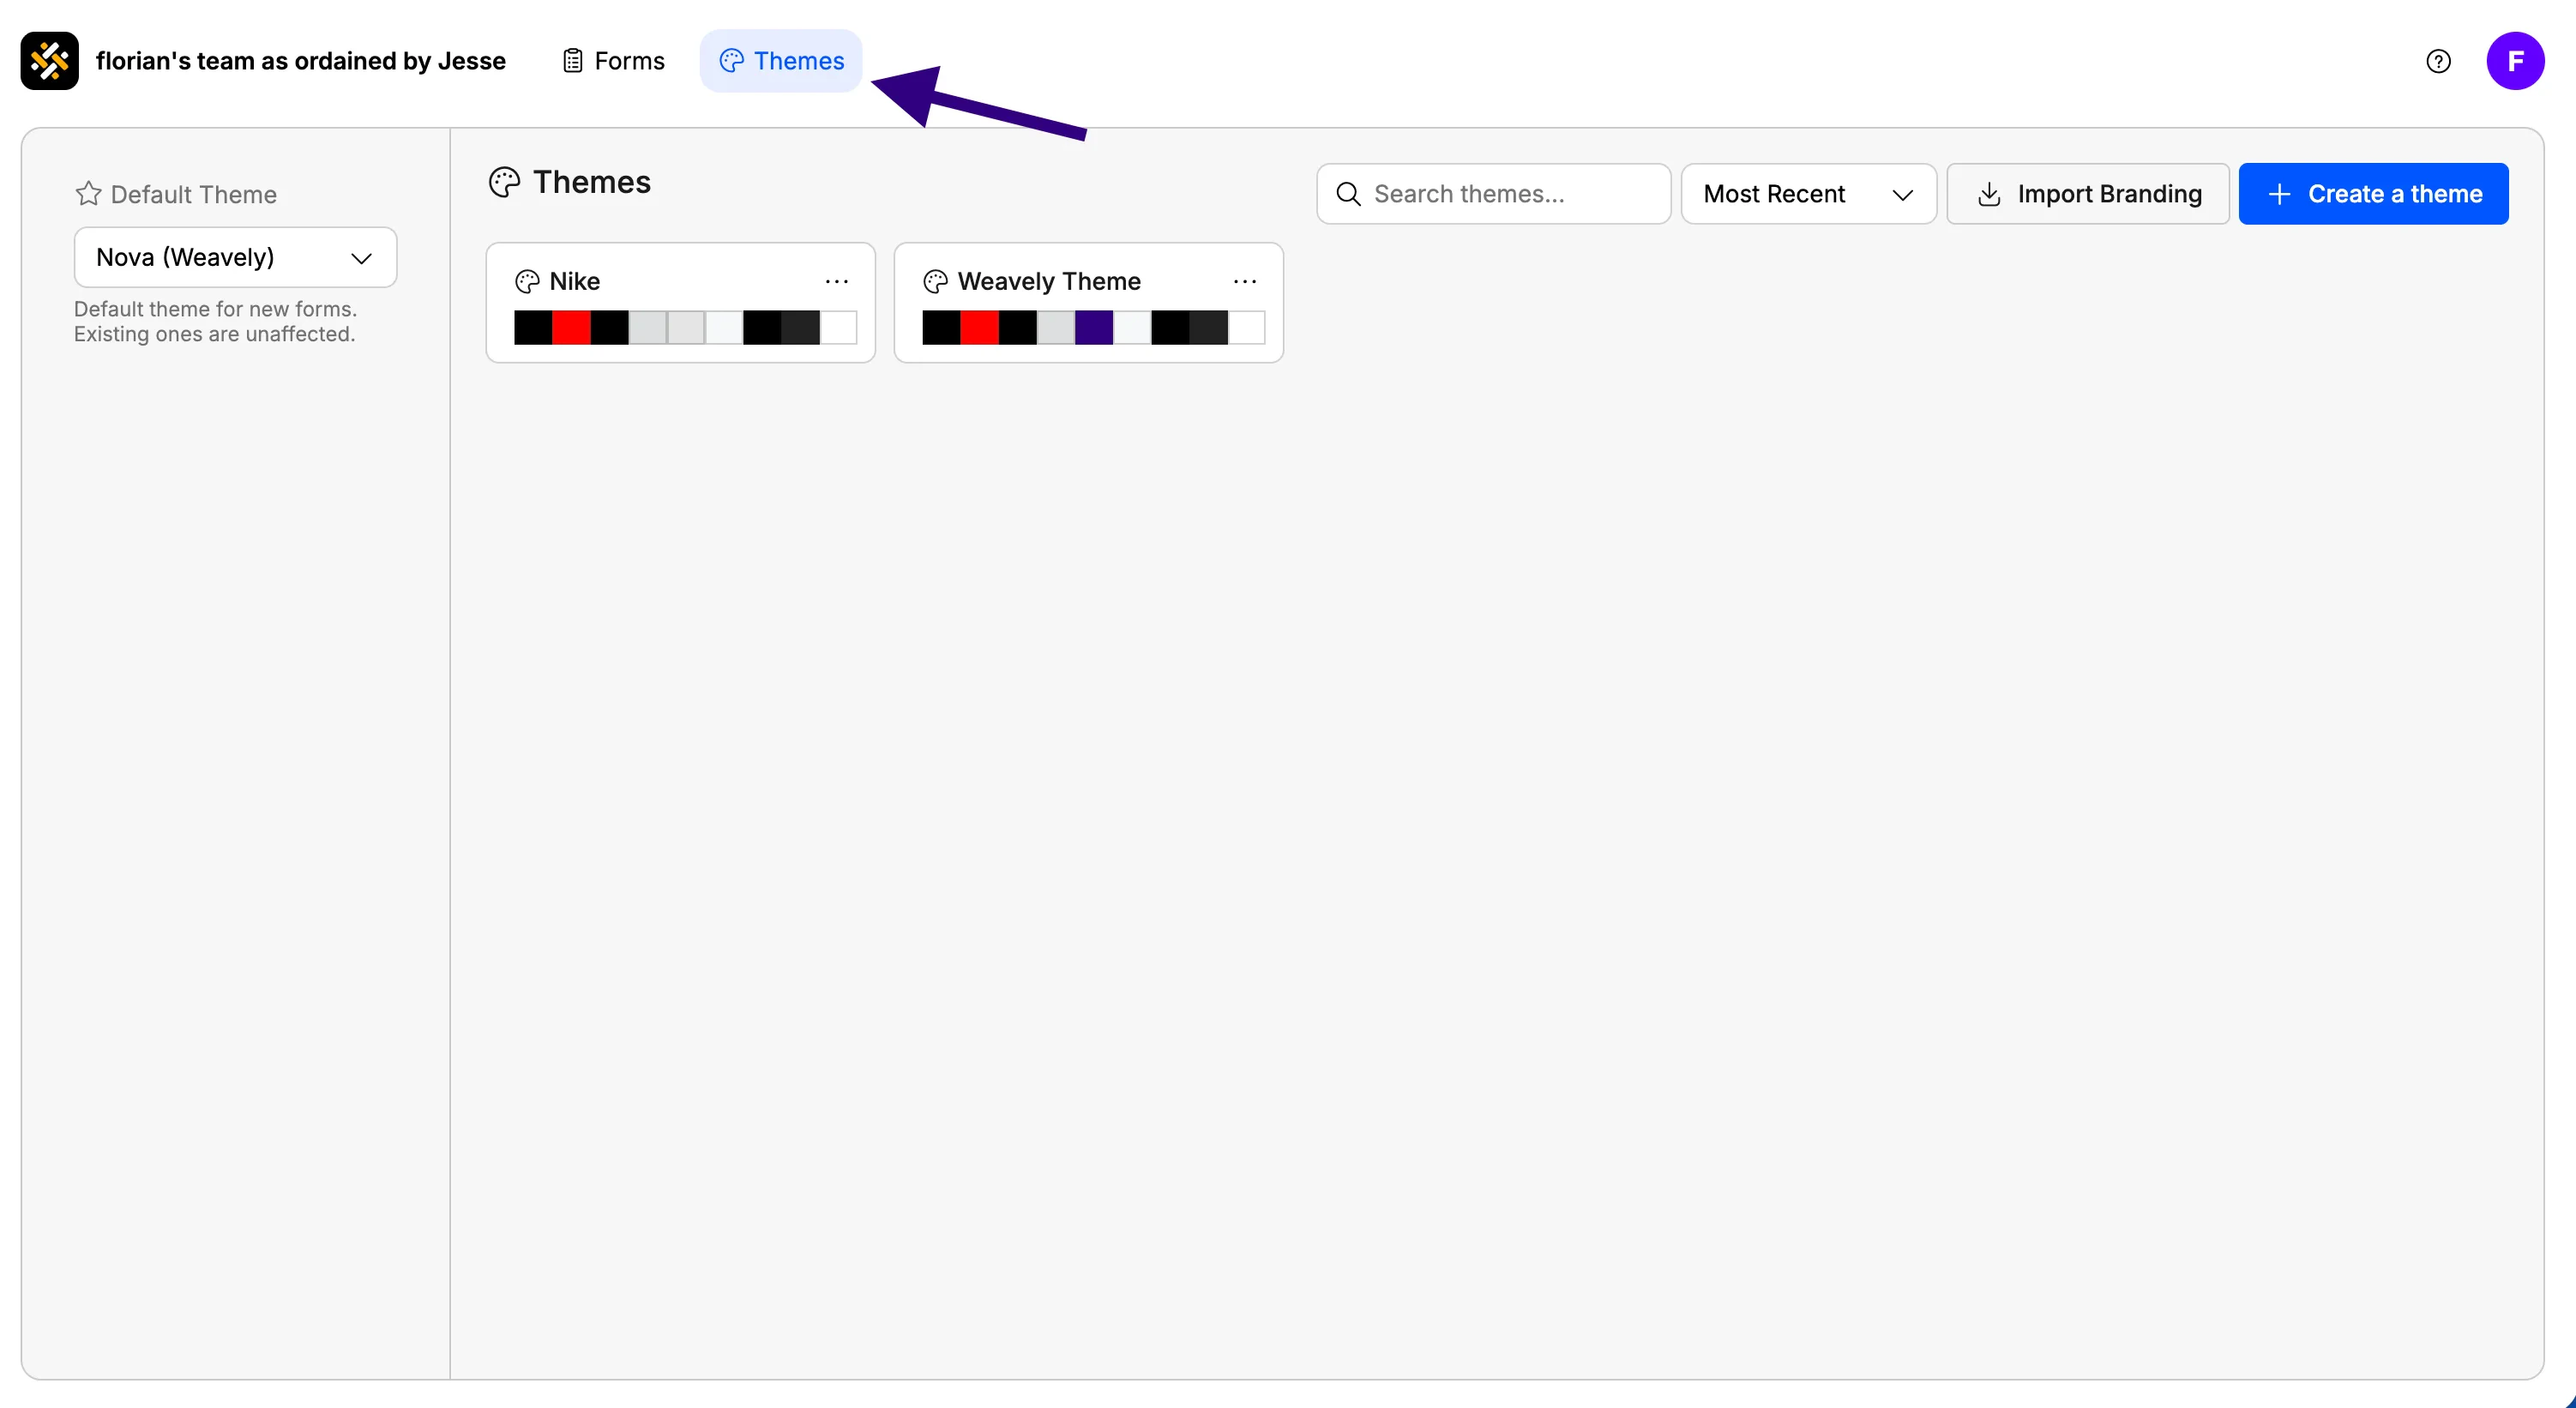
From your Weavely dashboard, click the **Themes** menu (under the Forms menu). This is where all your saved themes live and where you can create new ones.
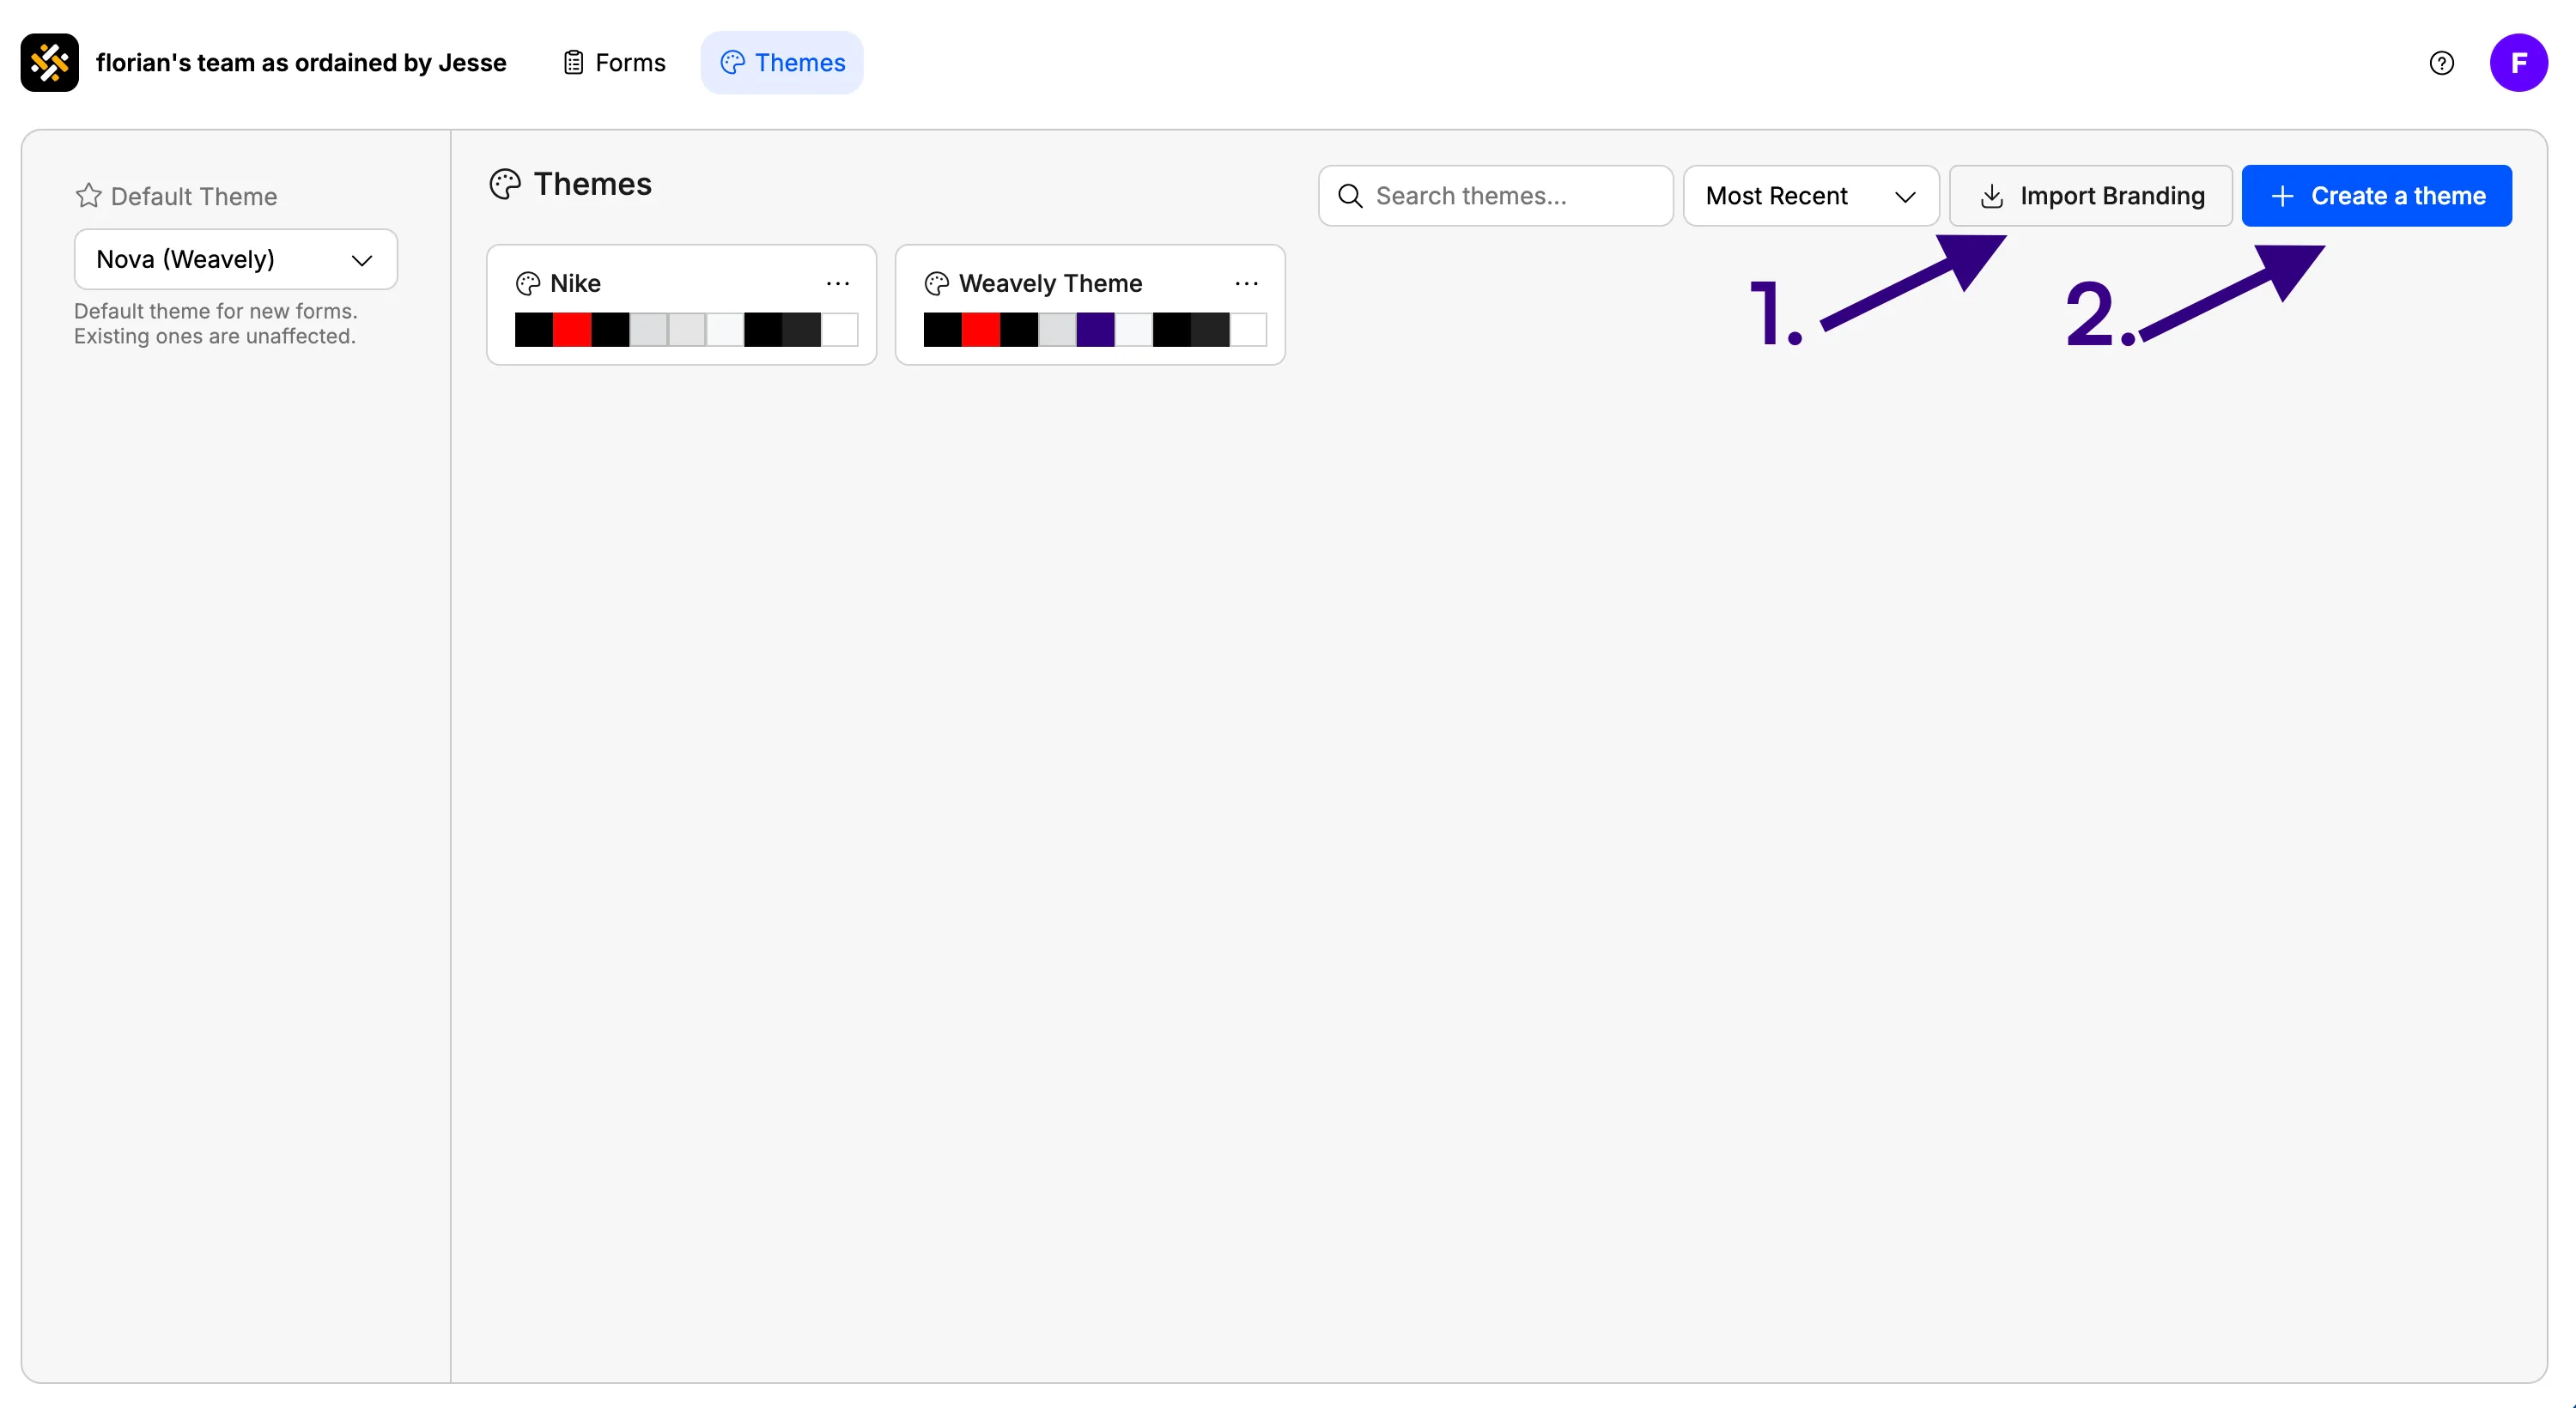
## Creating a new theme
You have two ways to get started:
Click **Create theme**. You'll be asked to either:
* **1. Import your branding**: paste in your website URL and let Weavely pull your logo, colors, and visual style automatically
* **2. Start from scratch**: build your form design manually
The import option works best for well-known brands or sites with clearly defined CSS variables. If your brand isn't recognized, you can always tweak manually after importing.
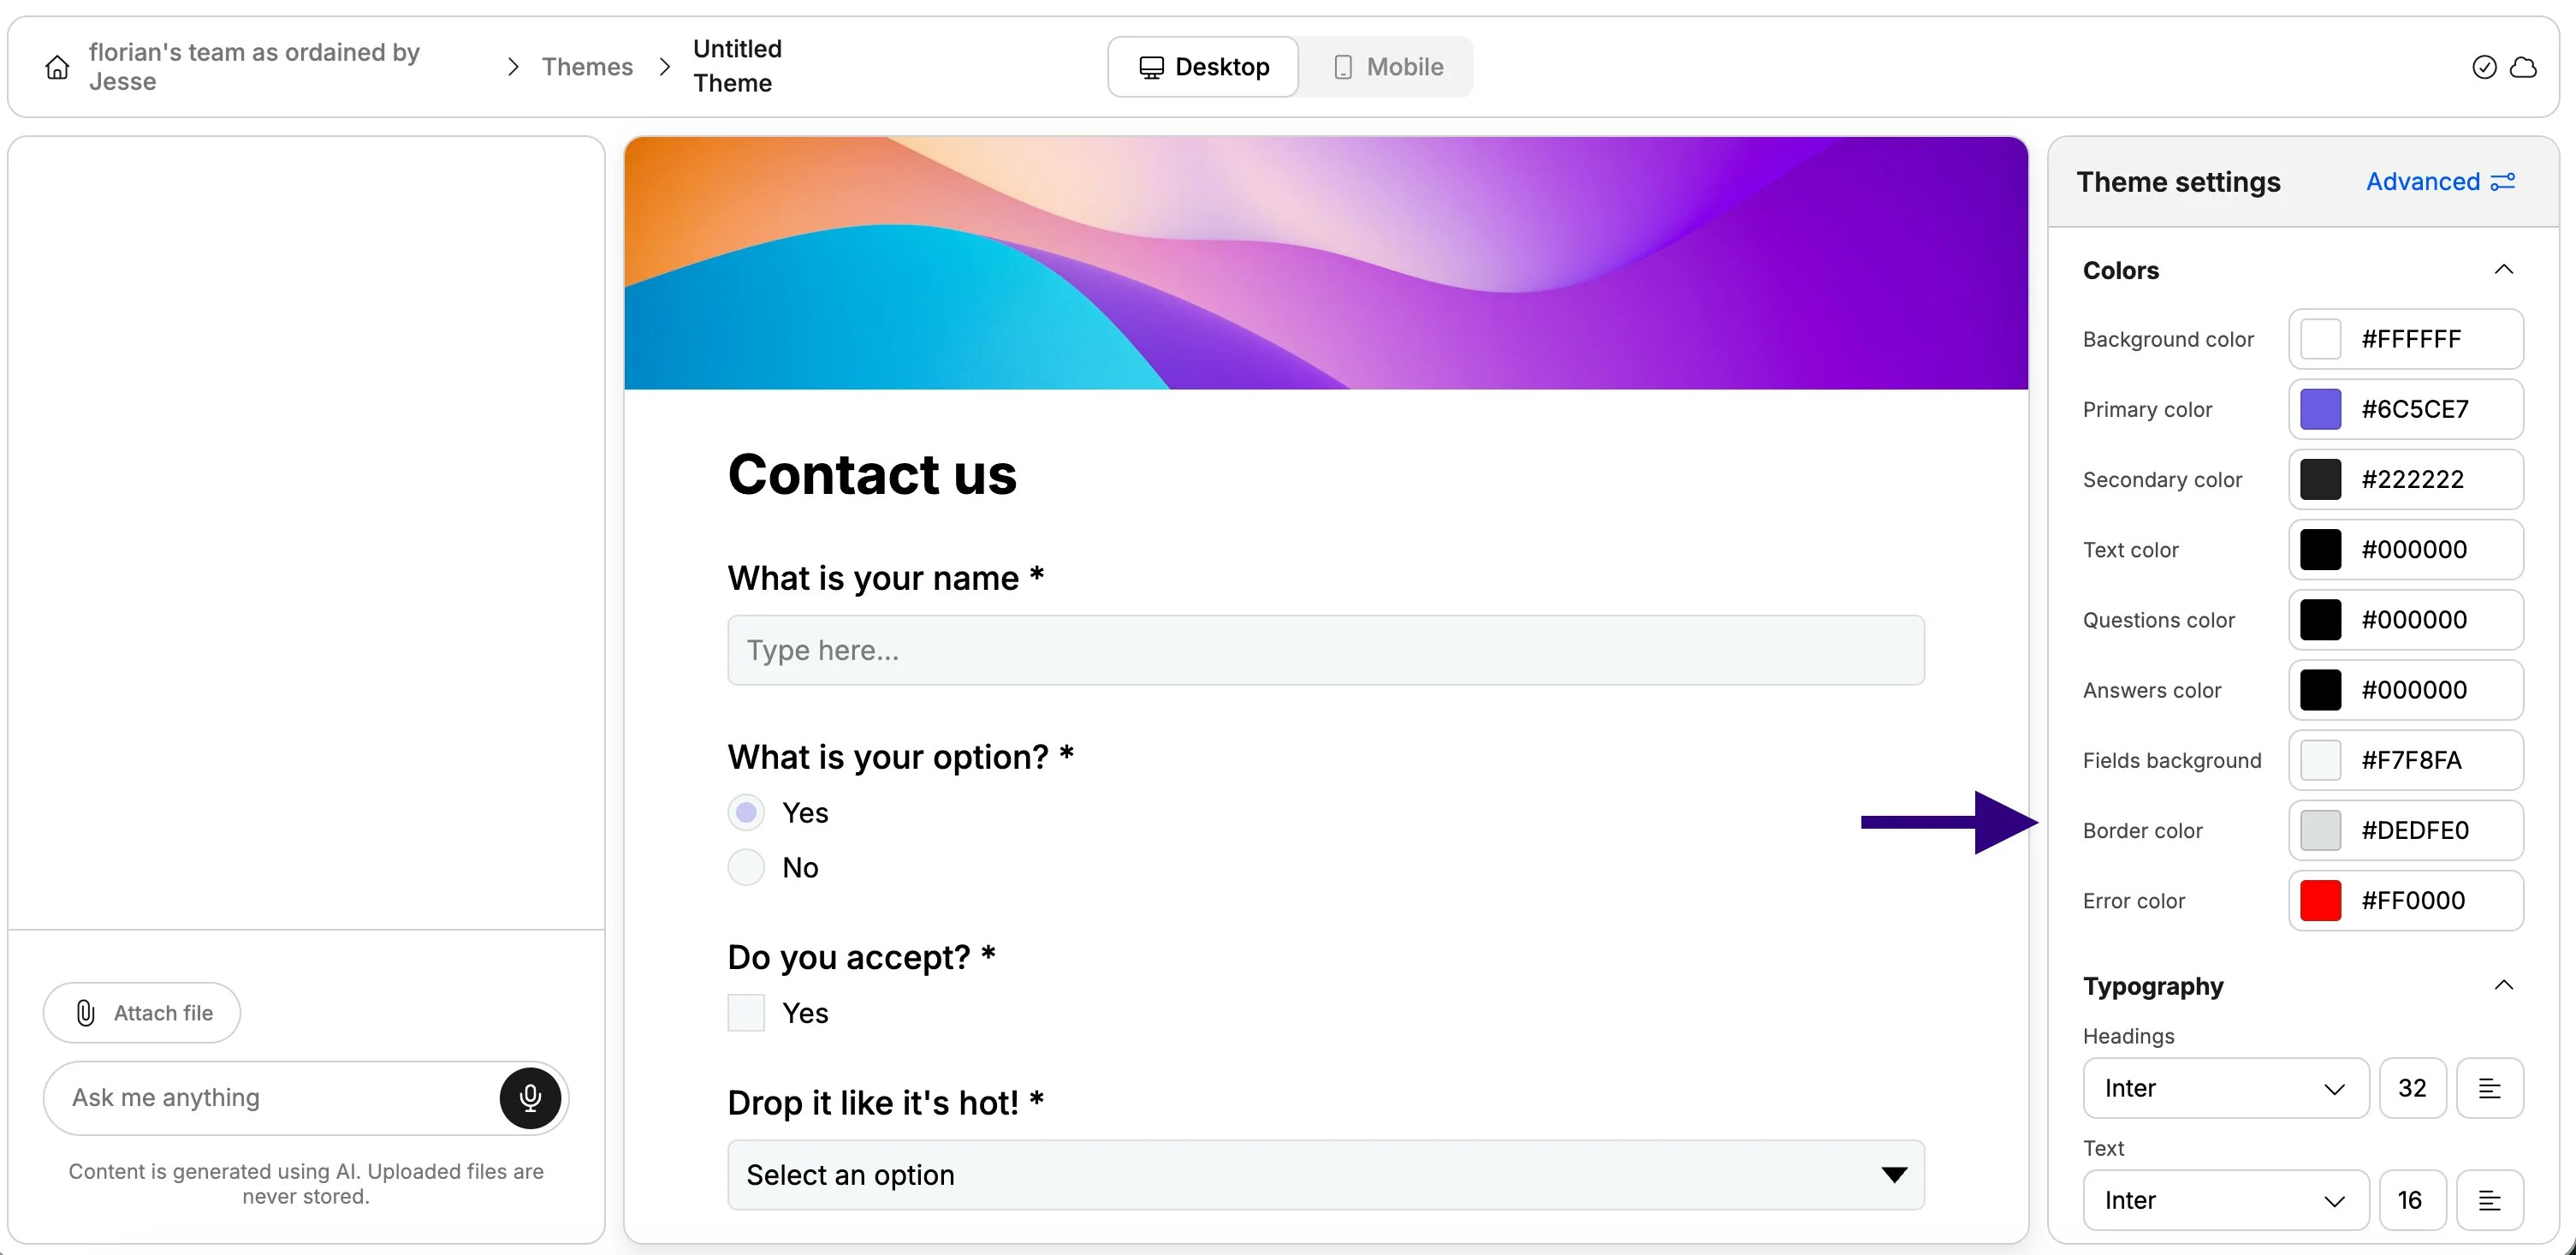
The editor shows a **live preview** of how your form elements will look — inputs, buttons, labels, and backgrounds. This is a preview only, not an actual form, so you won't be adding or removing fields here.
Under the **Colors** section, set your:
* Background color
* Primary / accent color
* Text and label colors
Under **Typography**, choose your font family and adjust sizing to match your brand.
Scroll down to see layout and logo options:
* **Logo** — toggle it on/off, set the size, and choose the alignment (left, center, or right)
* **Form visual** — enable a header image or color band at the top, side or background of each form
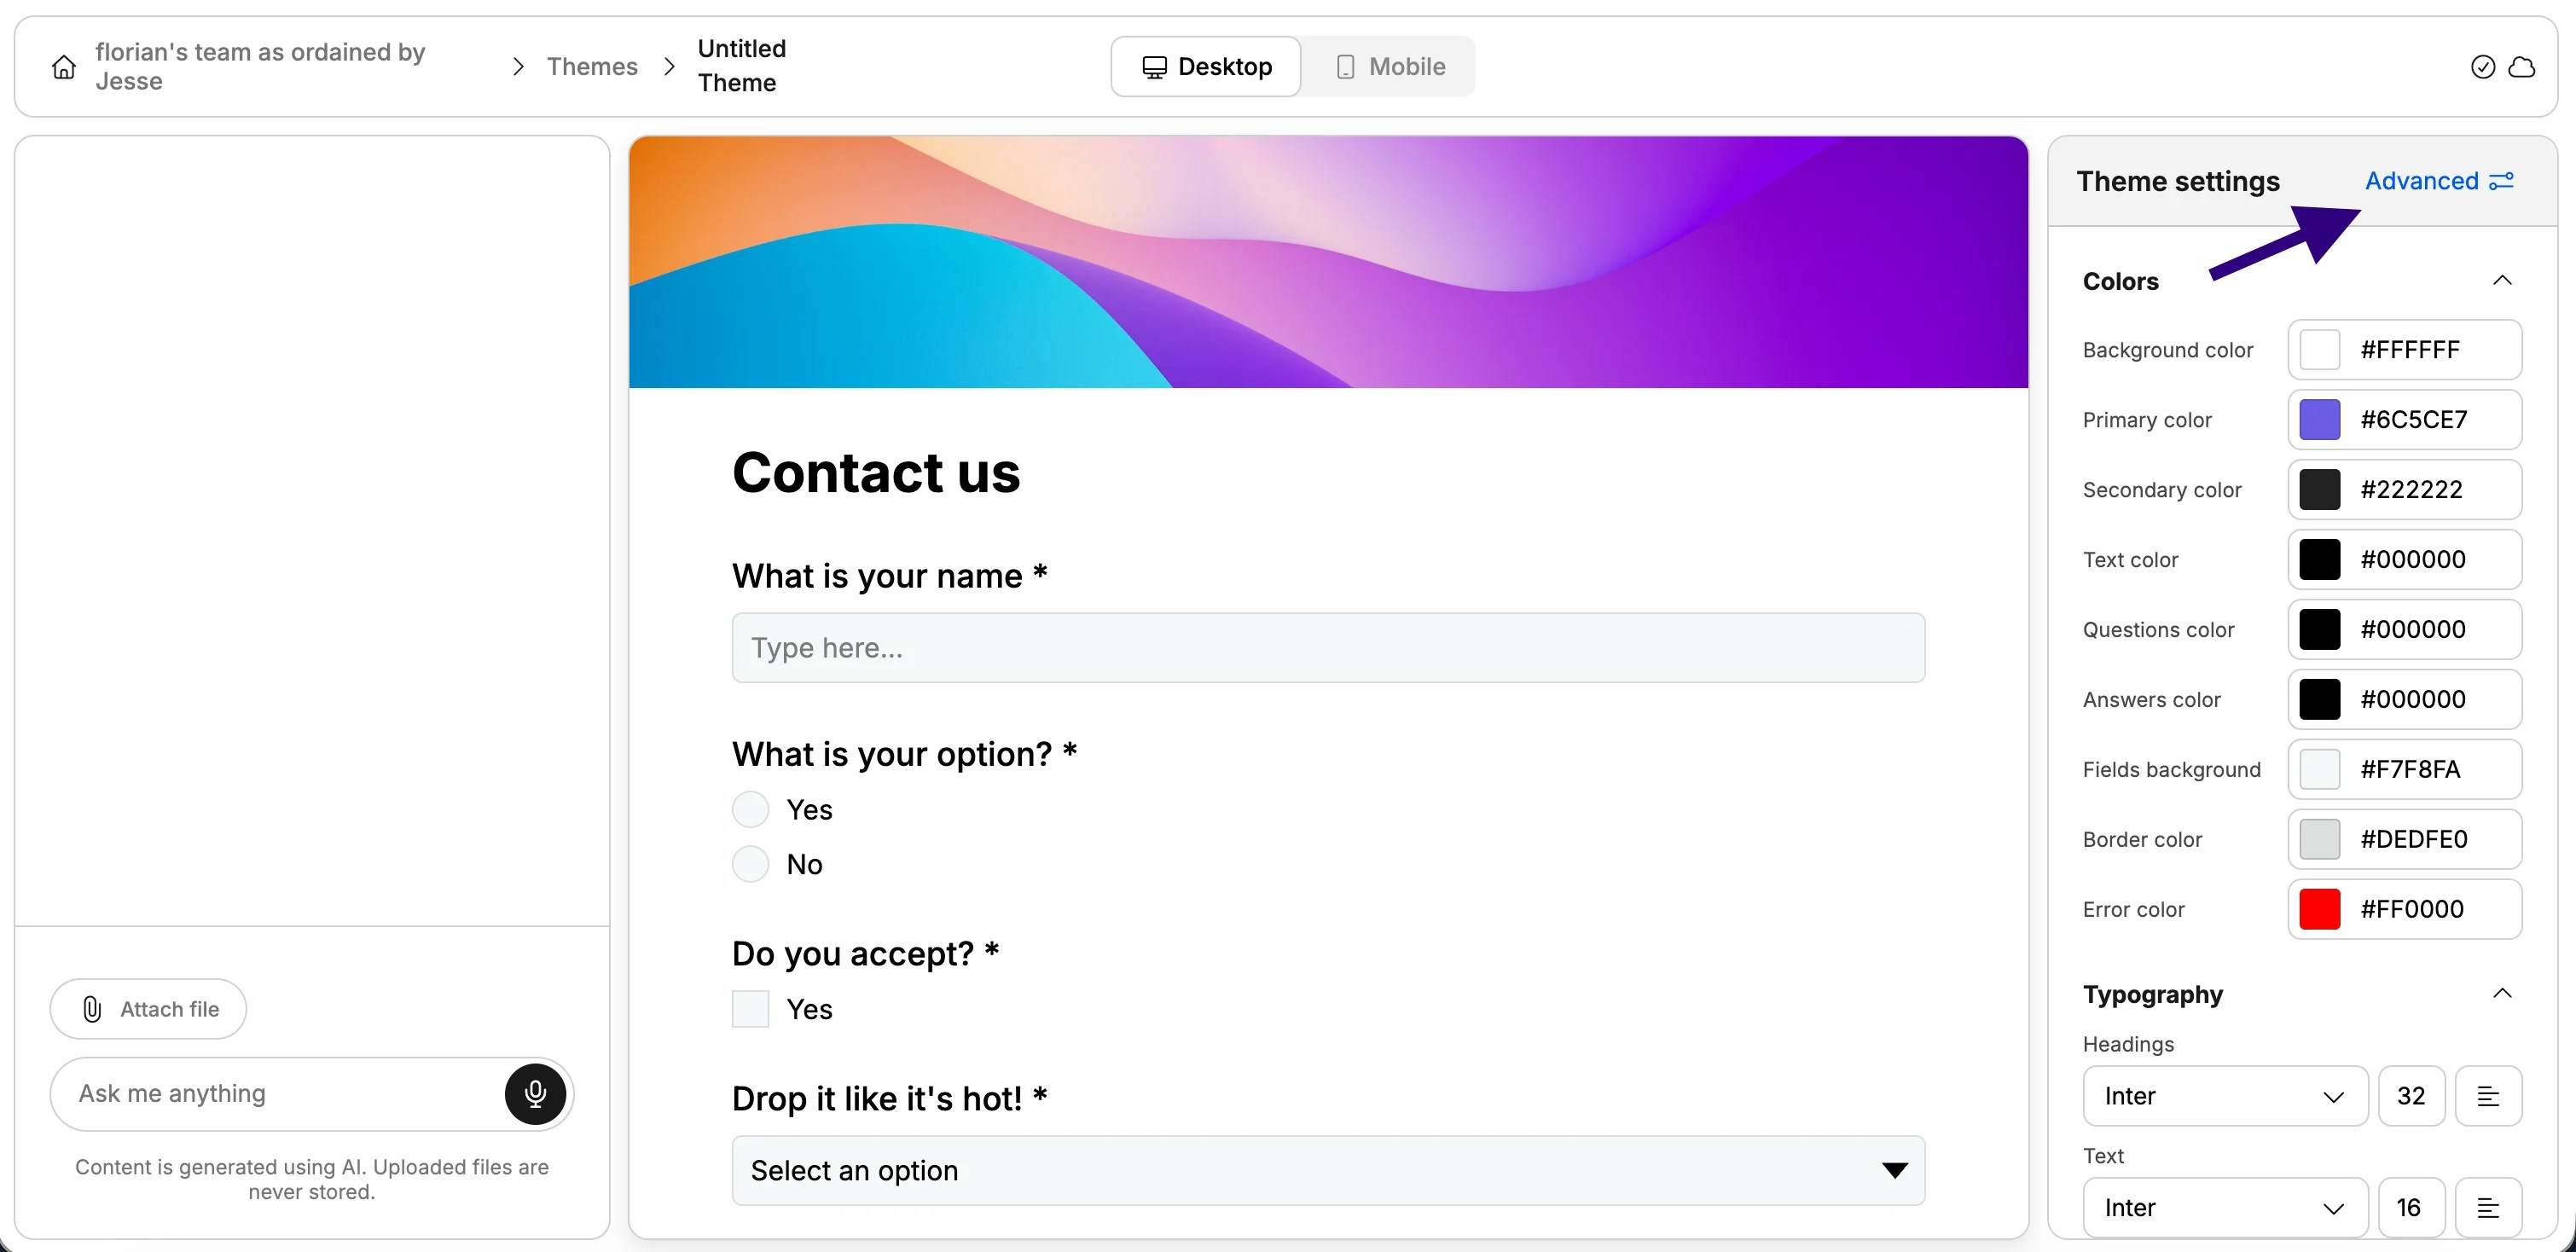
Press the *"Advanced"* button to access a panel with more fine-grained options:
* **Form width and spacing** — control how wide and airy your forms feel
* **Input shape** — choose between default rounded or square corners
* **Button shape** — same options: rounded, square, or default
* **Hover animation** — pick the animation style for button interactions
* **Custom CSS** — completely customise the look and feel of your form
Custom CSS is a paid feature.
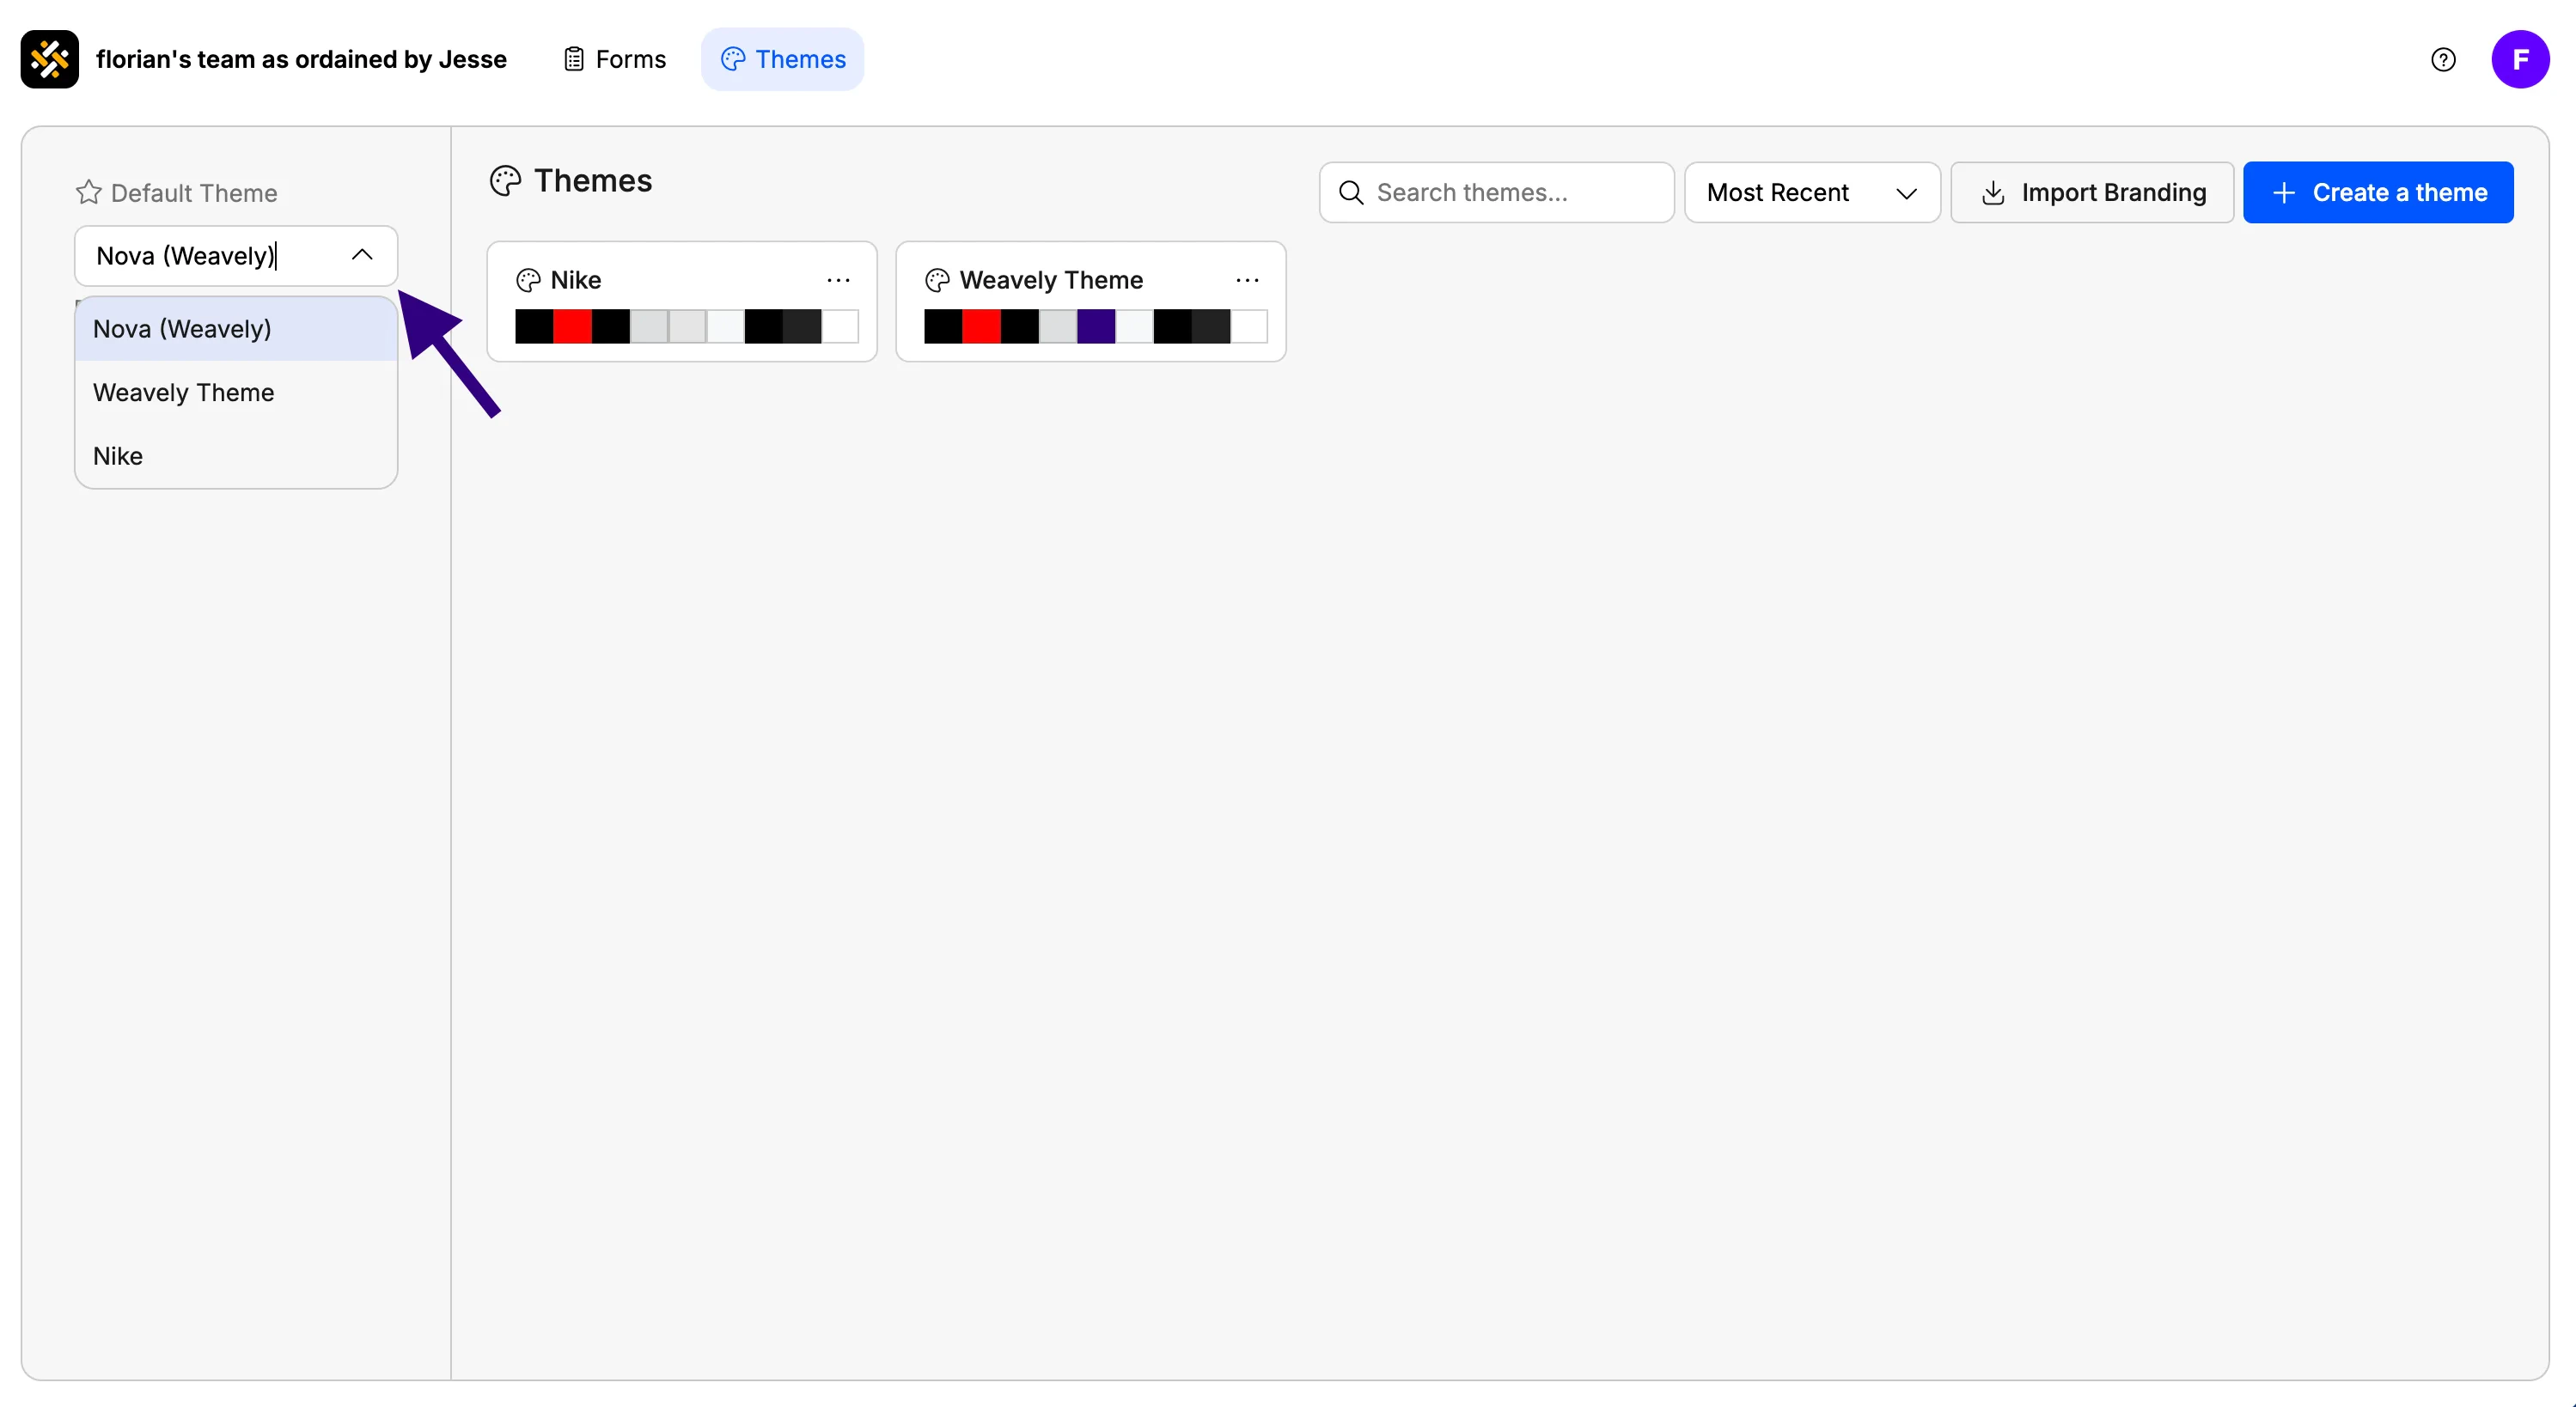
## Setting a theme as the default
Once your theme is saved (which happens automatically), you can make it the default so every new form automatically uses it.
1. Go back to the **Themes** tab in your dashboard
2. Find your theme and click **Set as default**
From that point on, any new form you create will open with your theme already applied — logo, colors, fonts, and all.
Create a test form after setting your default theme to confirm everything looks right before sending it to respondents.
## Applying a theme to a specific form
You can also apply (or switch) a theme on an individual form without changing the default:
1. Open the form in the editor
2. Click the **Theme** pill button next to the right sidebar
3. Select the theme you want from *"Templates"*
This is useful when you manage forms for multiple brands or clients on the same workspace.
 ## Creating a new theme
You have two ways to get started:
## Creating a new theme
You have two ways to get started:
 From that point on, any new form you create will open with your theme already applied — logo, colors, fonts, and all.