Method 1: Styling Individual Forms
Using AI to Style Your Form
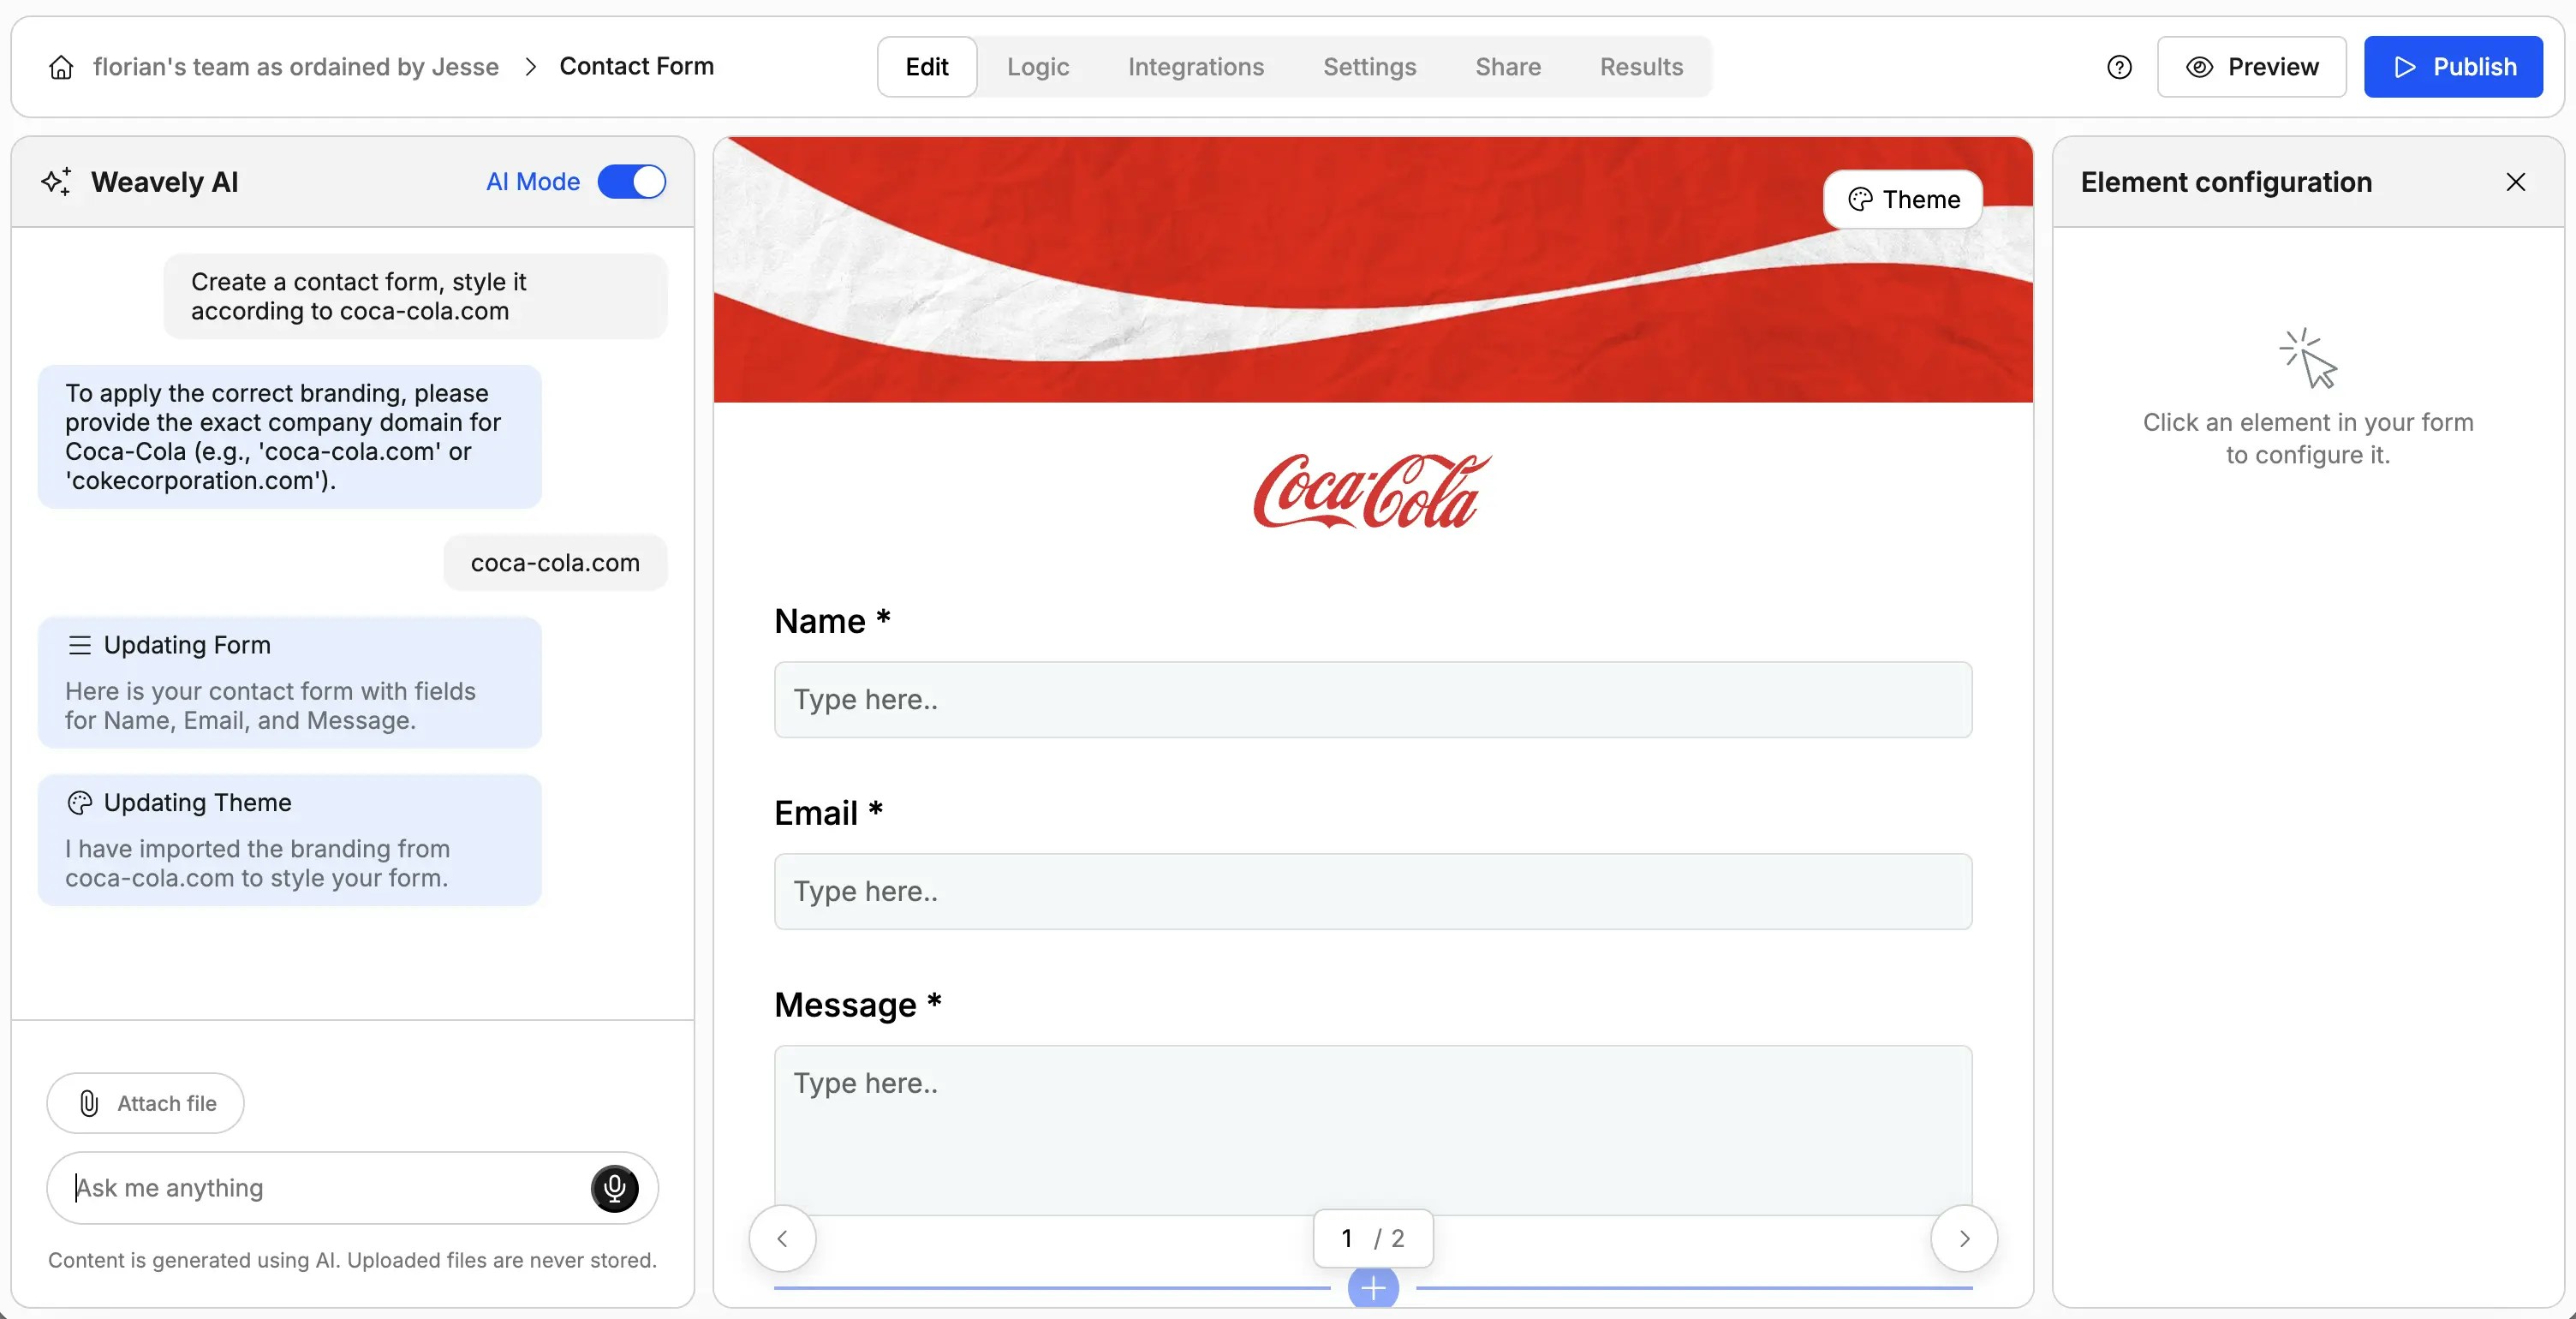
The fastest way to customize your form design is by asking Weavely’s AI to apply styling for you. Custom Colors Simply describe the colors you want in the chat. For example:- “Make all the buttons black”
- “Use #FF5733 as the primary color”
- “Make this look like Coca-Cola”
Manual Styling Options
For more control over your form design, use the manual styling panel in the form editor.
- Background color
- Primary color (for buttons and key elements)
- Secondary color (for text)
- No visual - Form only, no background image
- Visual on left - Background image on the left side
- Visual on right - Background image on the right side
- Transparent form - Form overlays the background
- Search Unsplash - Type a keyword (e.g., “forest”) and Weavely will find a matching image
- Solid color - Use a plain color background
- Upload custom image - Use your own branded imagery
Advanced Styling Features
Click the Advanced button to access additional customization options: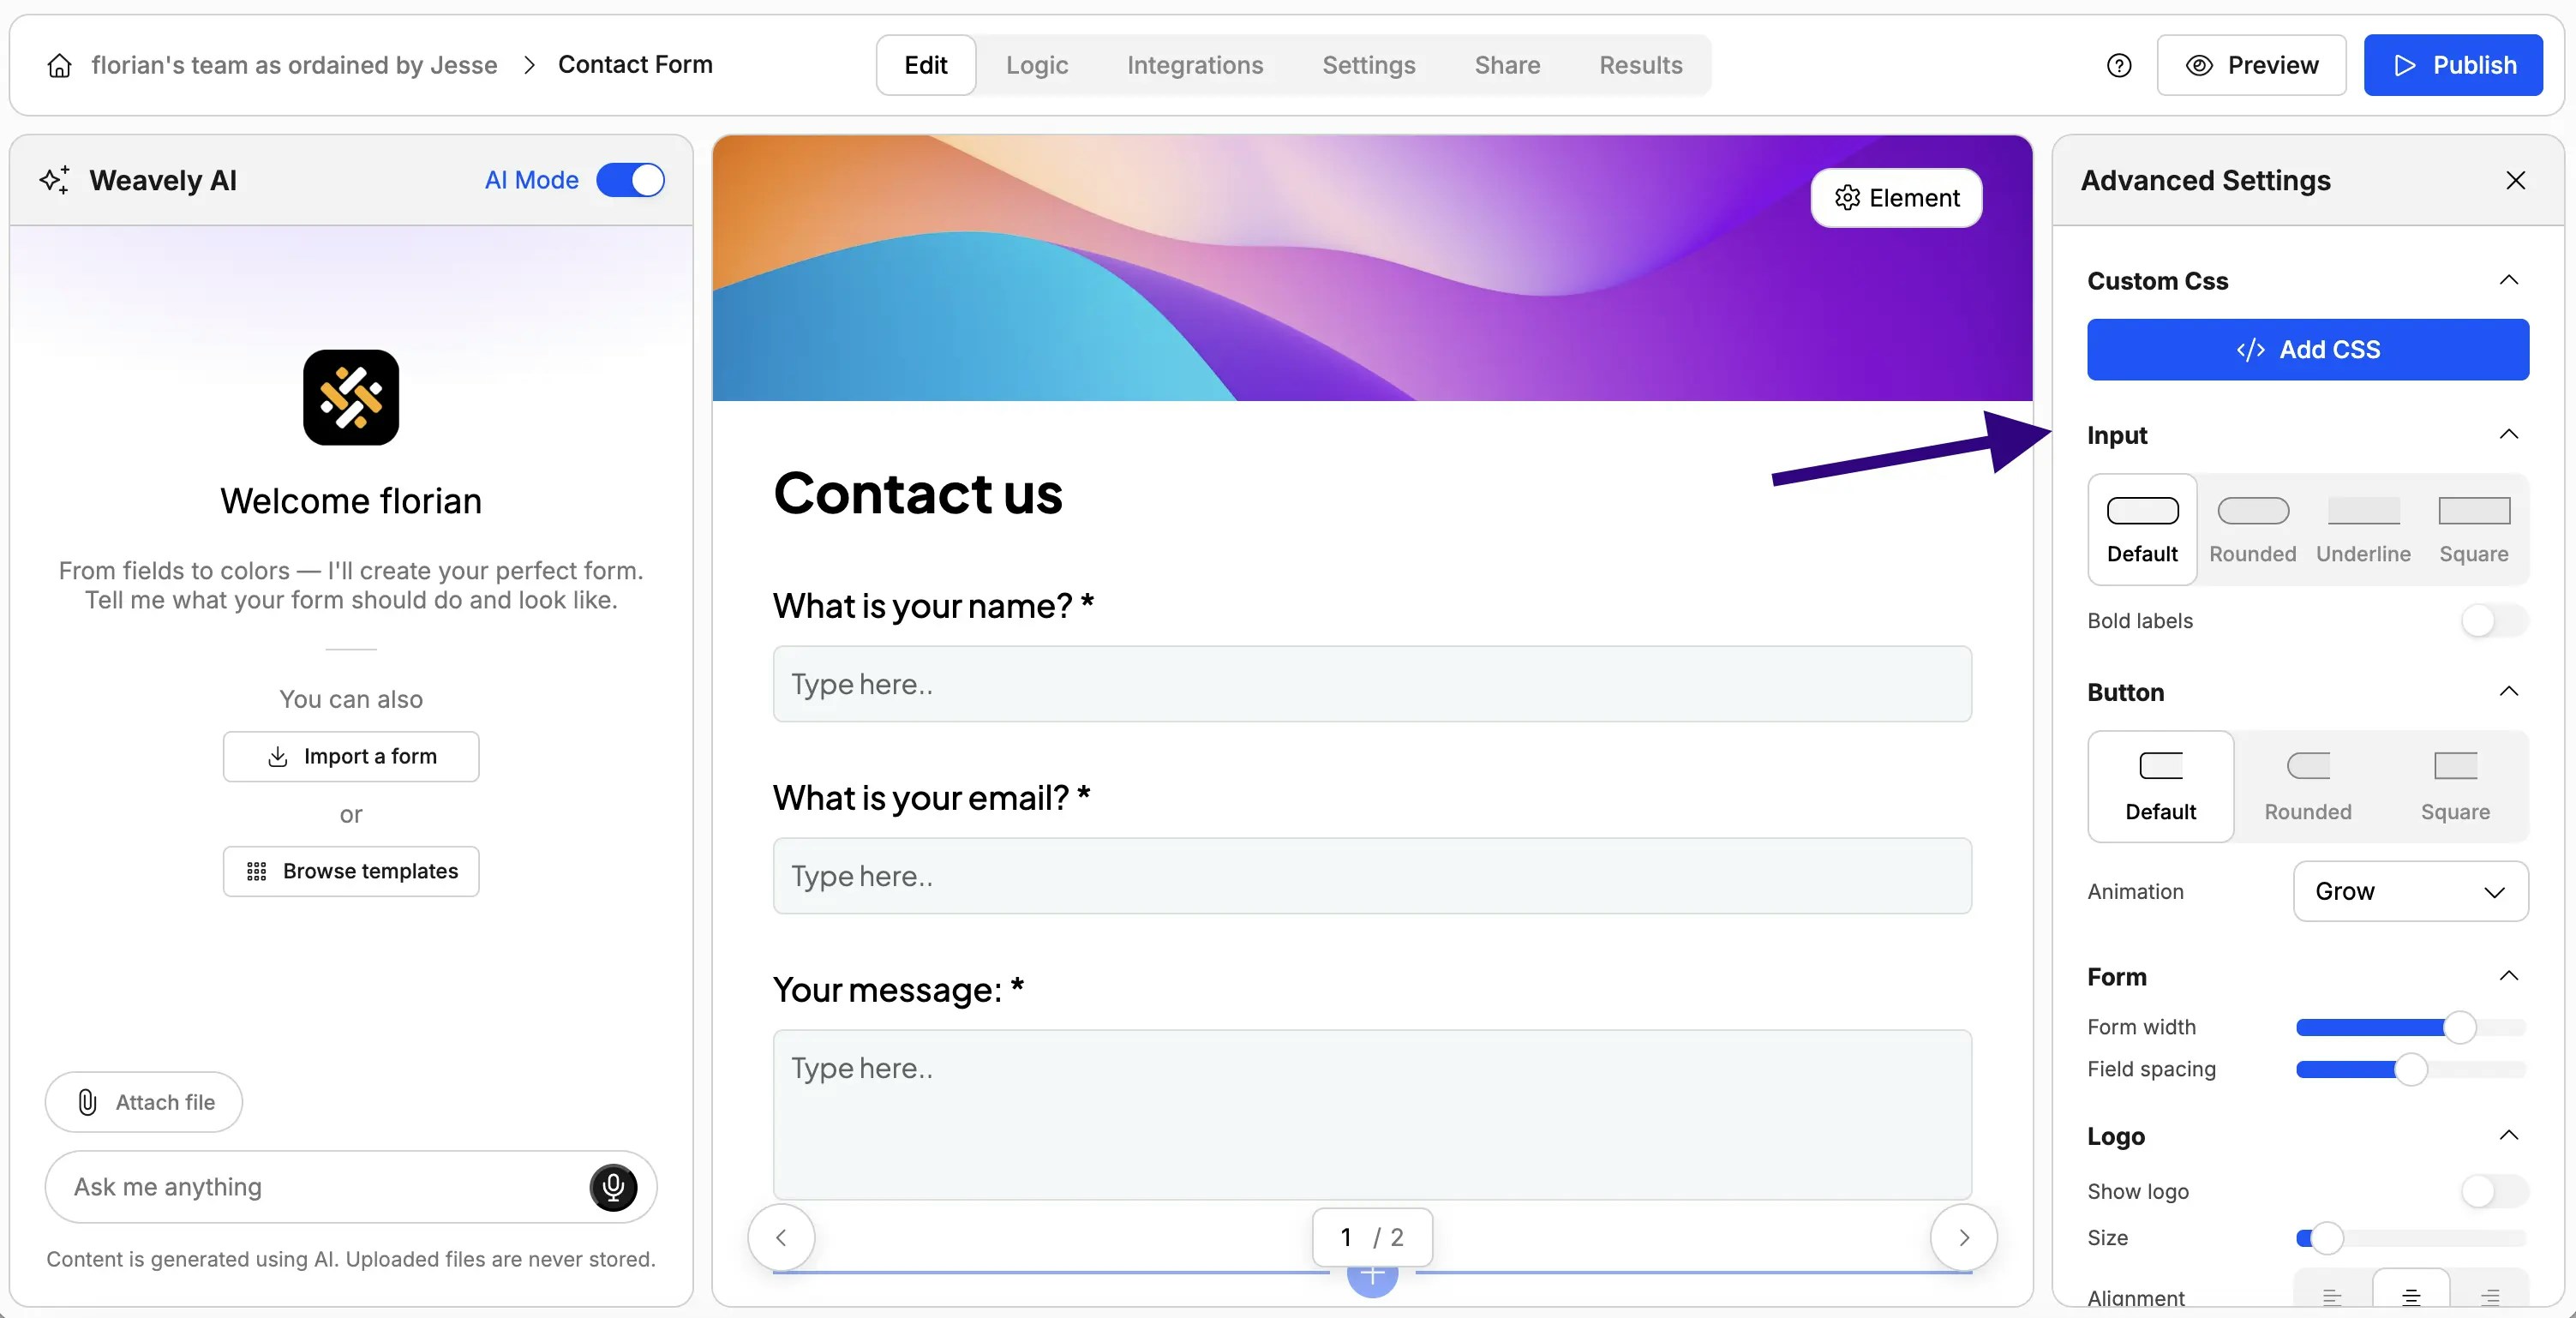
- Rounded inputs
- Underlined inputs
- Square inputs
- Rounded corners
- Square corners
- Toggle animations on/off
- Adjust form width
- Control spacing between fields
- Toggle Show logo on
- Upload your logo file
- Set the logo size
Method 2: Creating Account-Wide Themes
If you’re building multiple forms, you’ll want to avoid styling each one individually. Account-wide themes let you create a design once and reuse it across all your forms.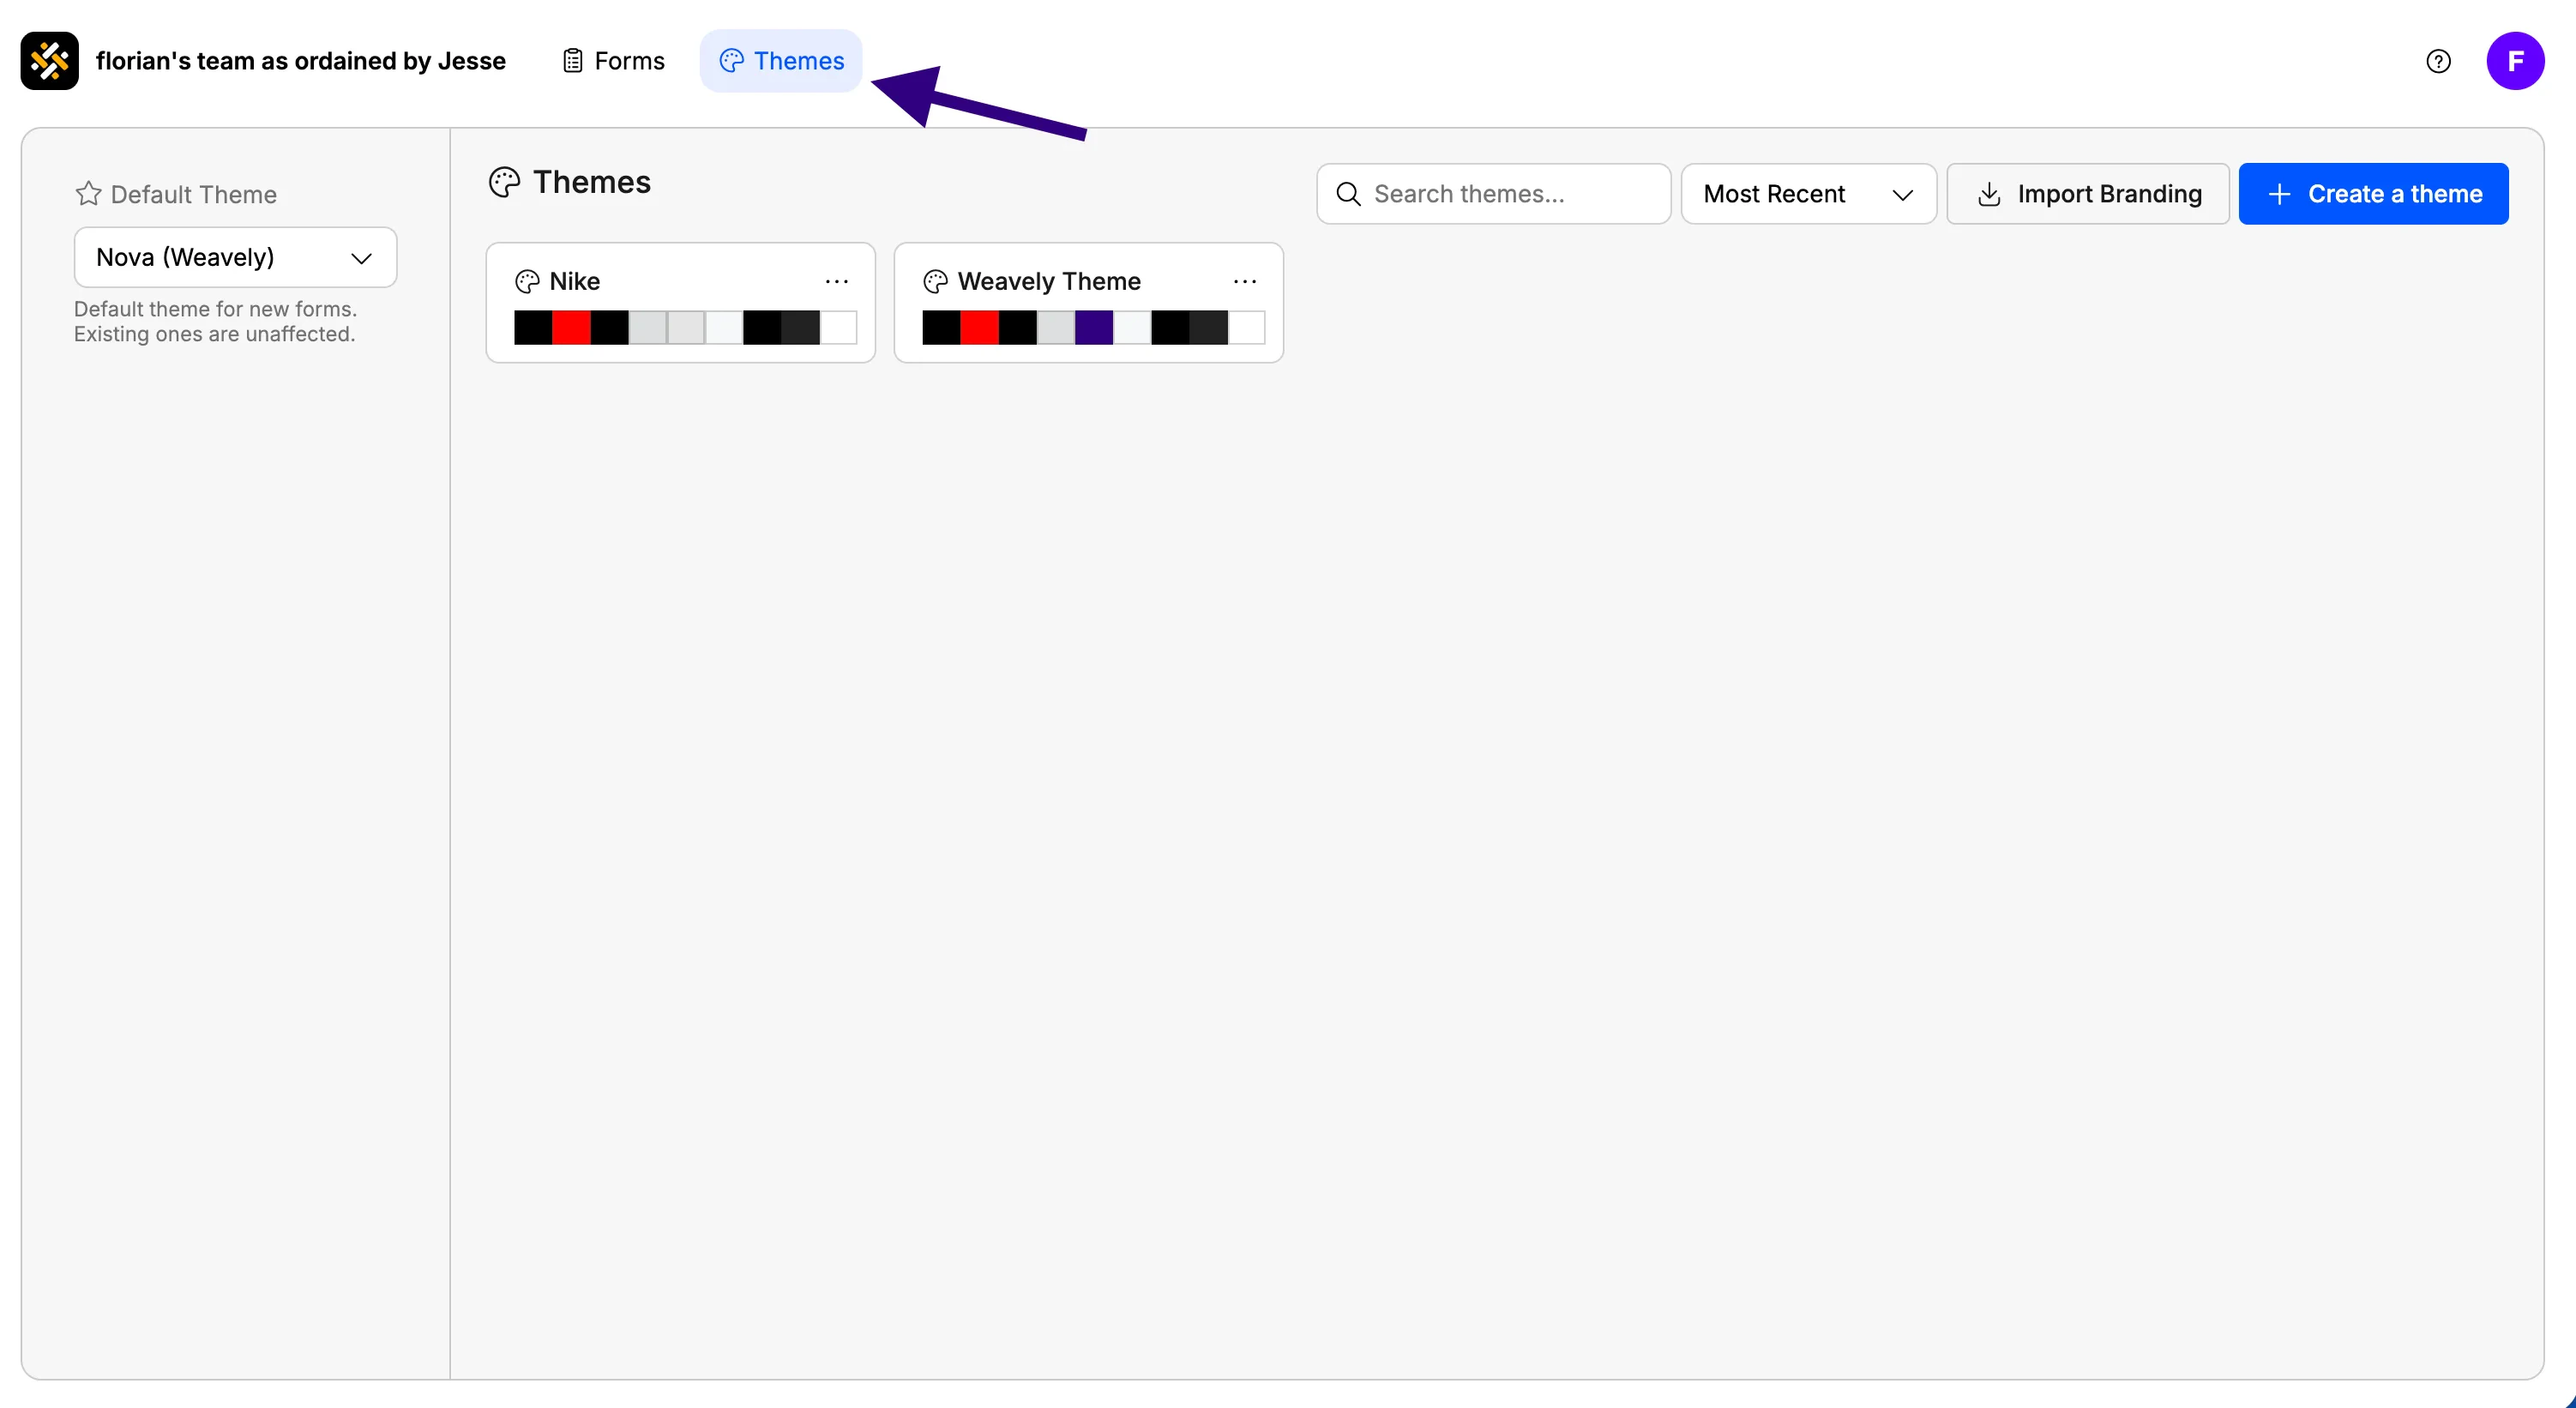
Accessing Theme Settings
From your dashboard:- Click on Themes in the navigation
- Select Create new theme
Creating a Theme
Import Brand Styling Just like with individual forms, you can import branding from any website:- Enter the brand’s domain (e.g., “coca-cola.com”)
- Click Import
- Weavely fetches the logo, colors, and fonts
- Set primary, secondary, and background colors
- Choose typography
- Configure layout preferences
- Add your logo
Important: When editing a theme, you’re only setting the visual style, not the form content. There’s no way to add specific questions or pages in theme settings.
Setting a Default Theme
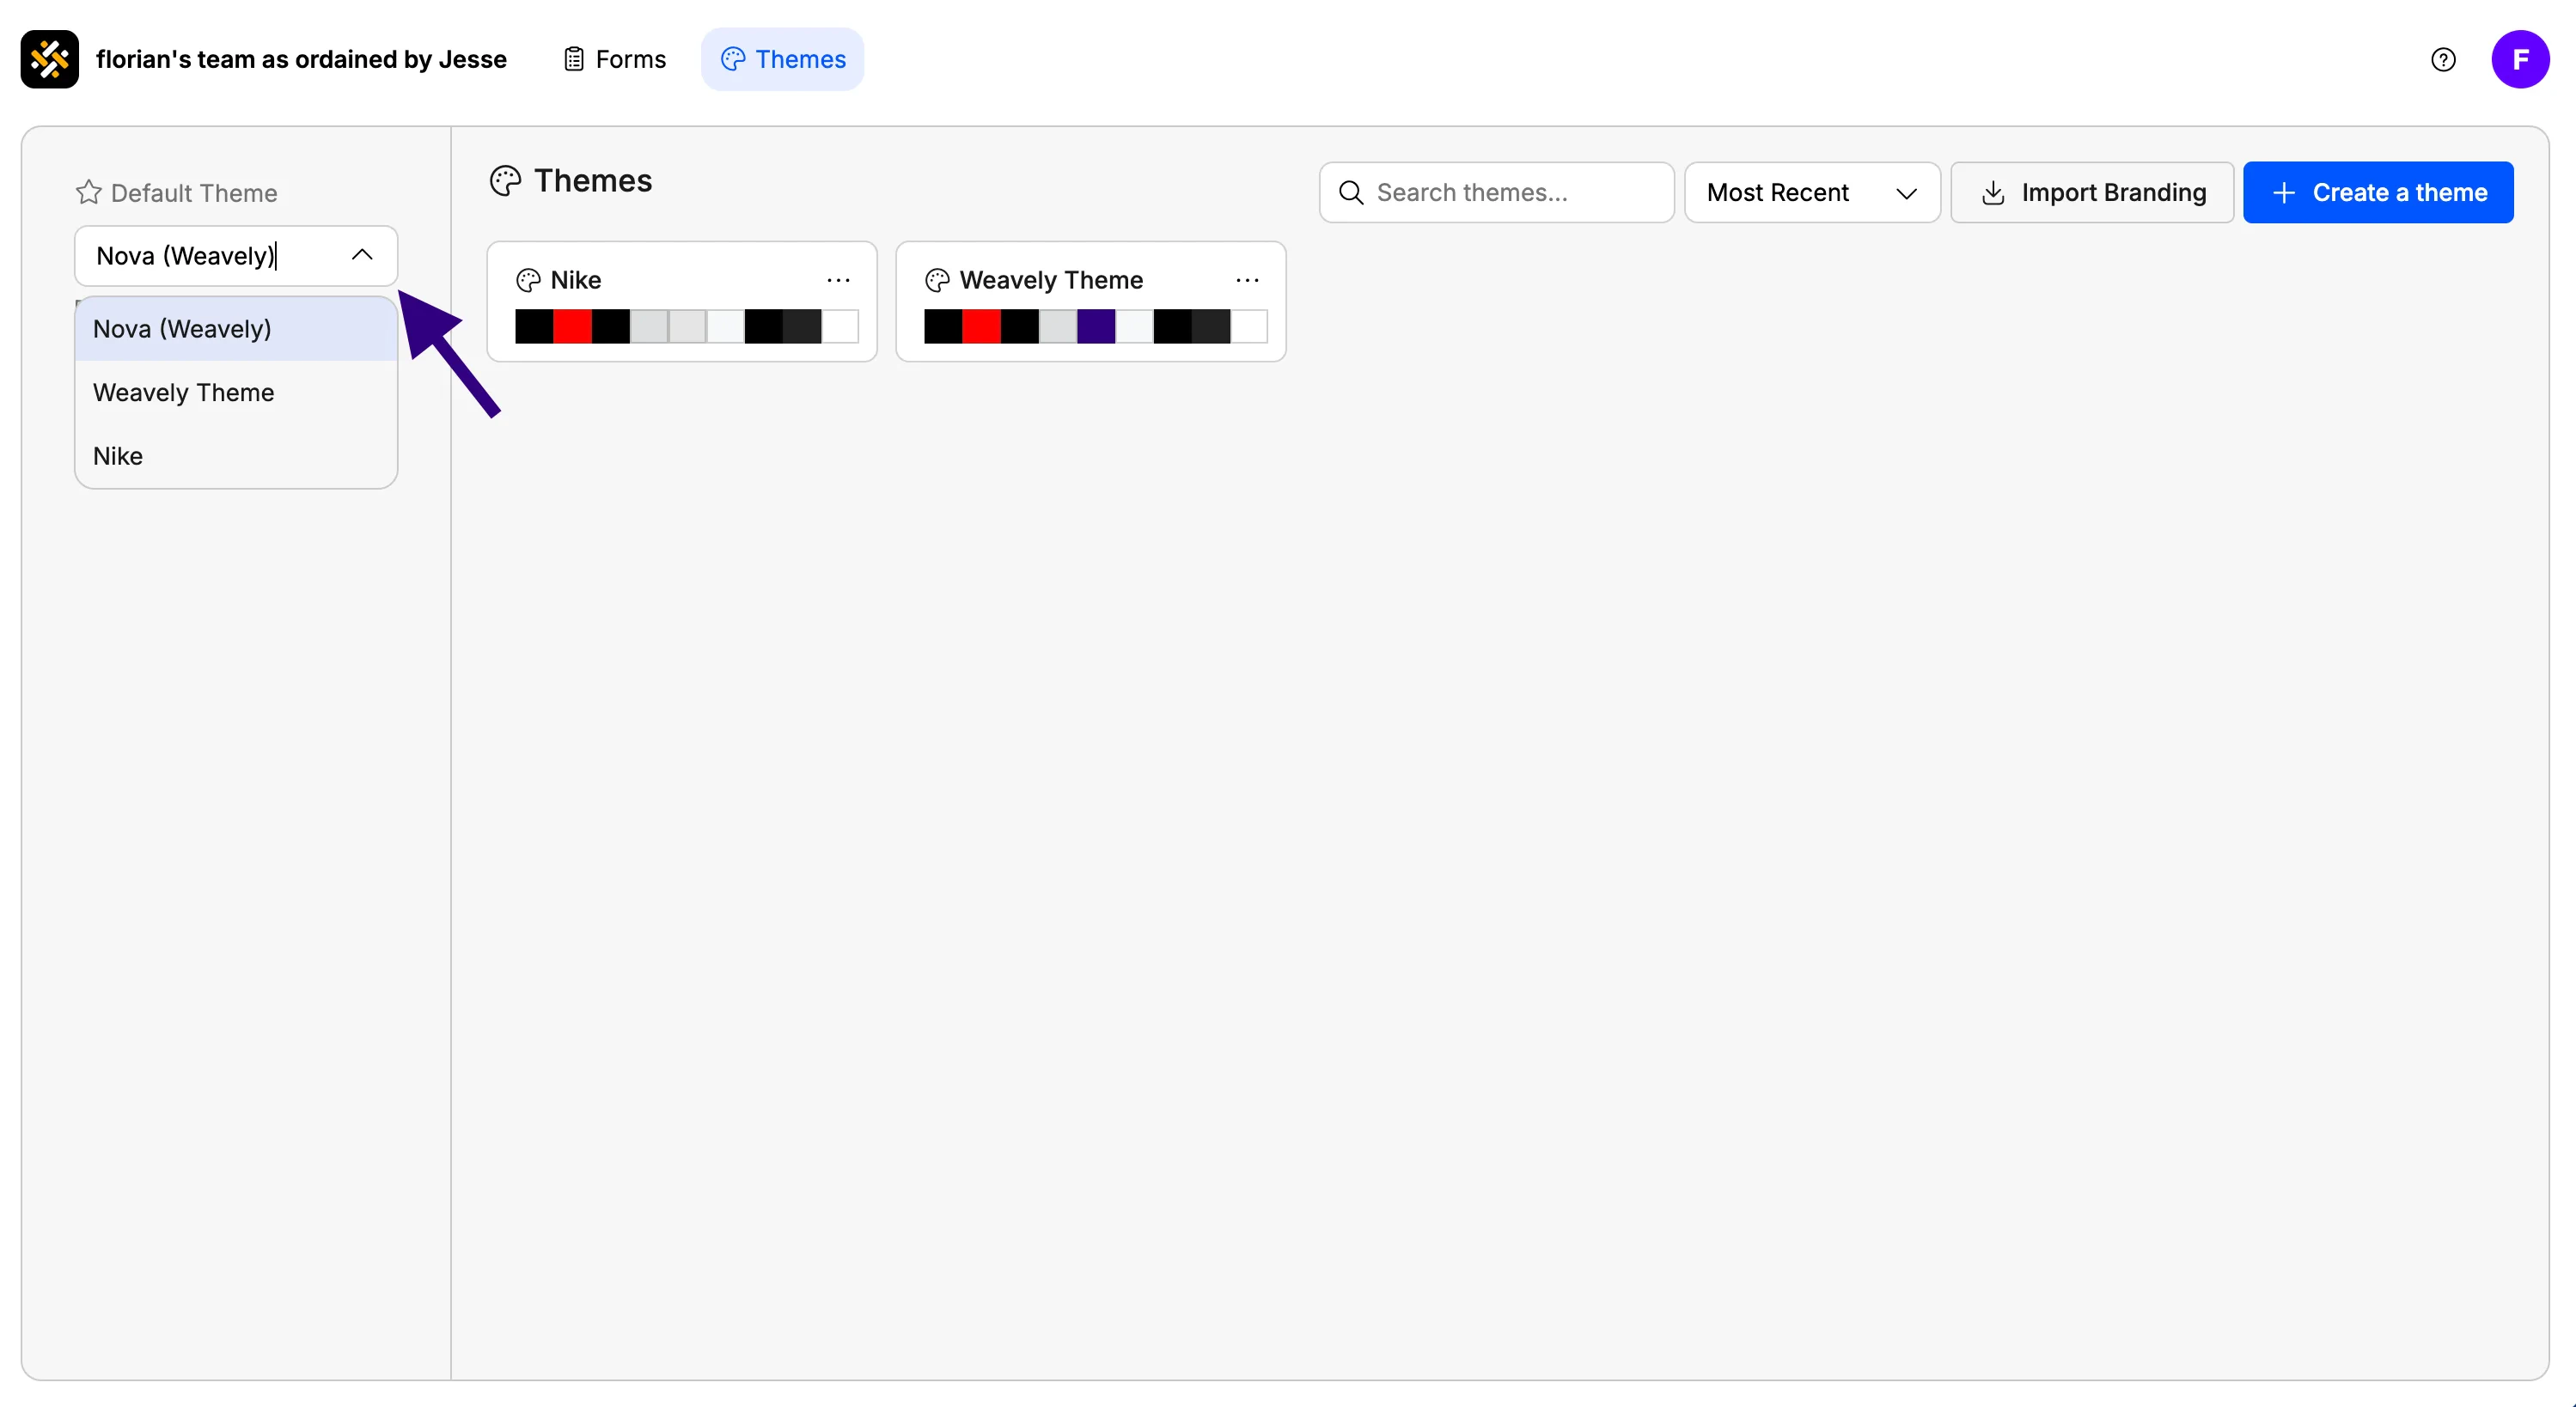
- Go to Themes in your dashboard
- Find the theme you want to use as default
- Click Set as default
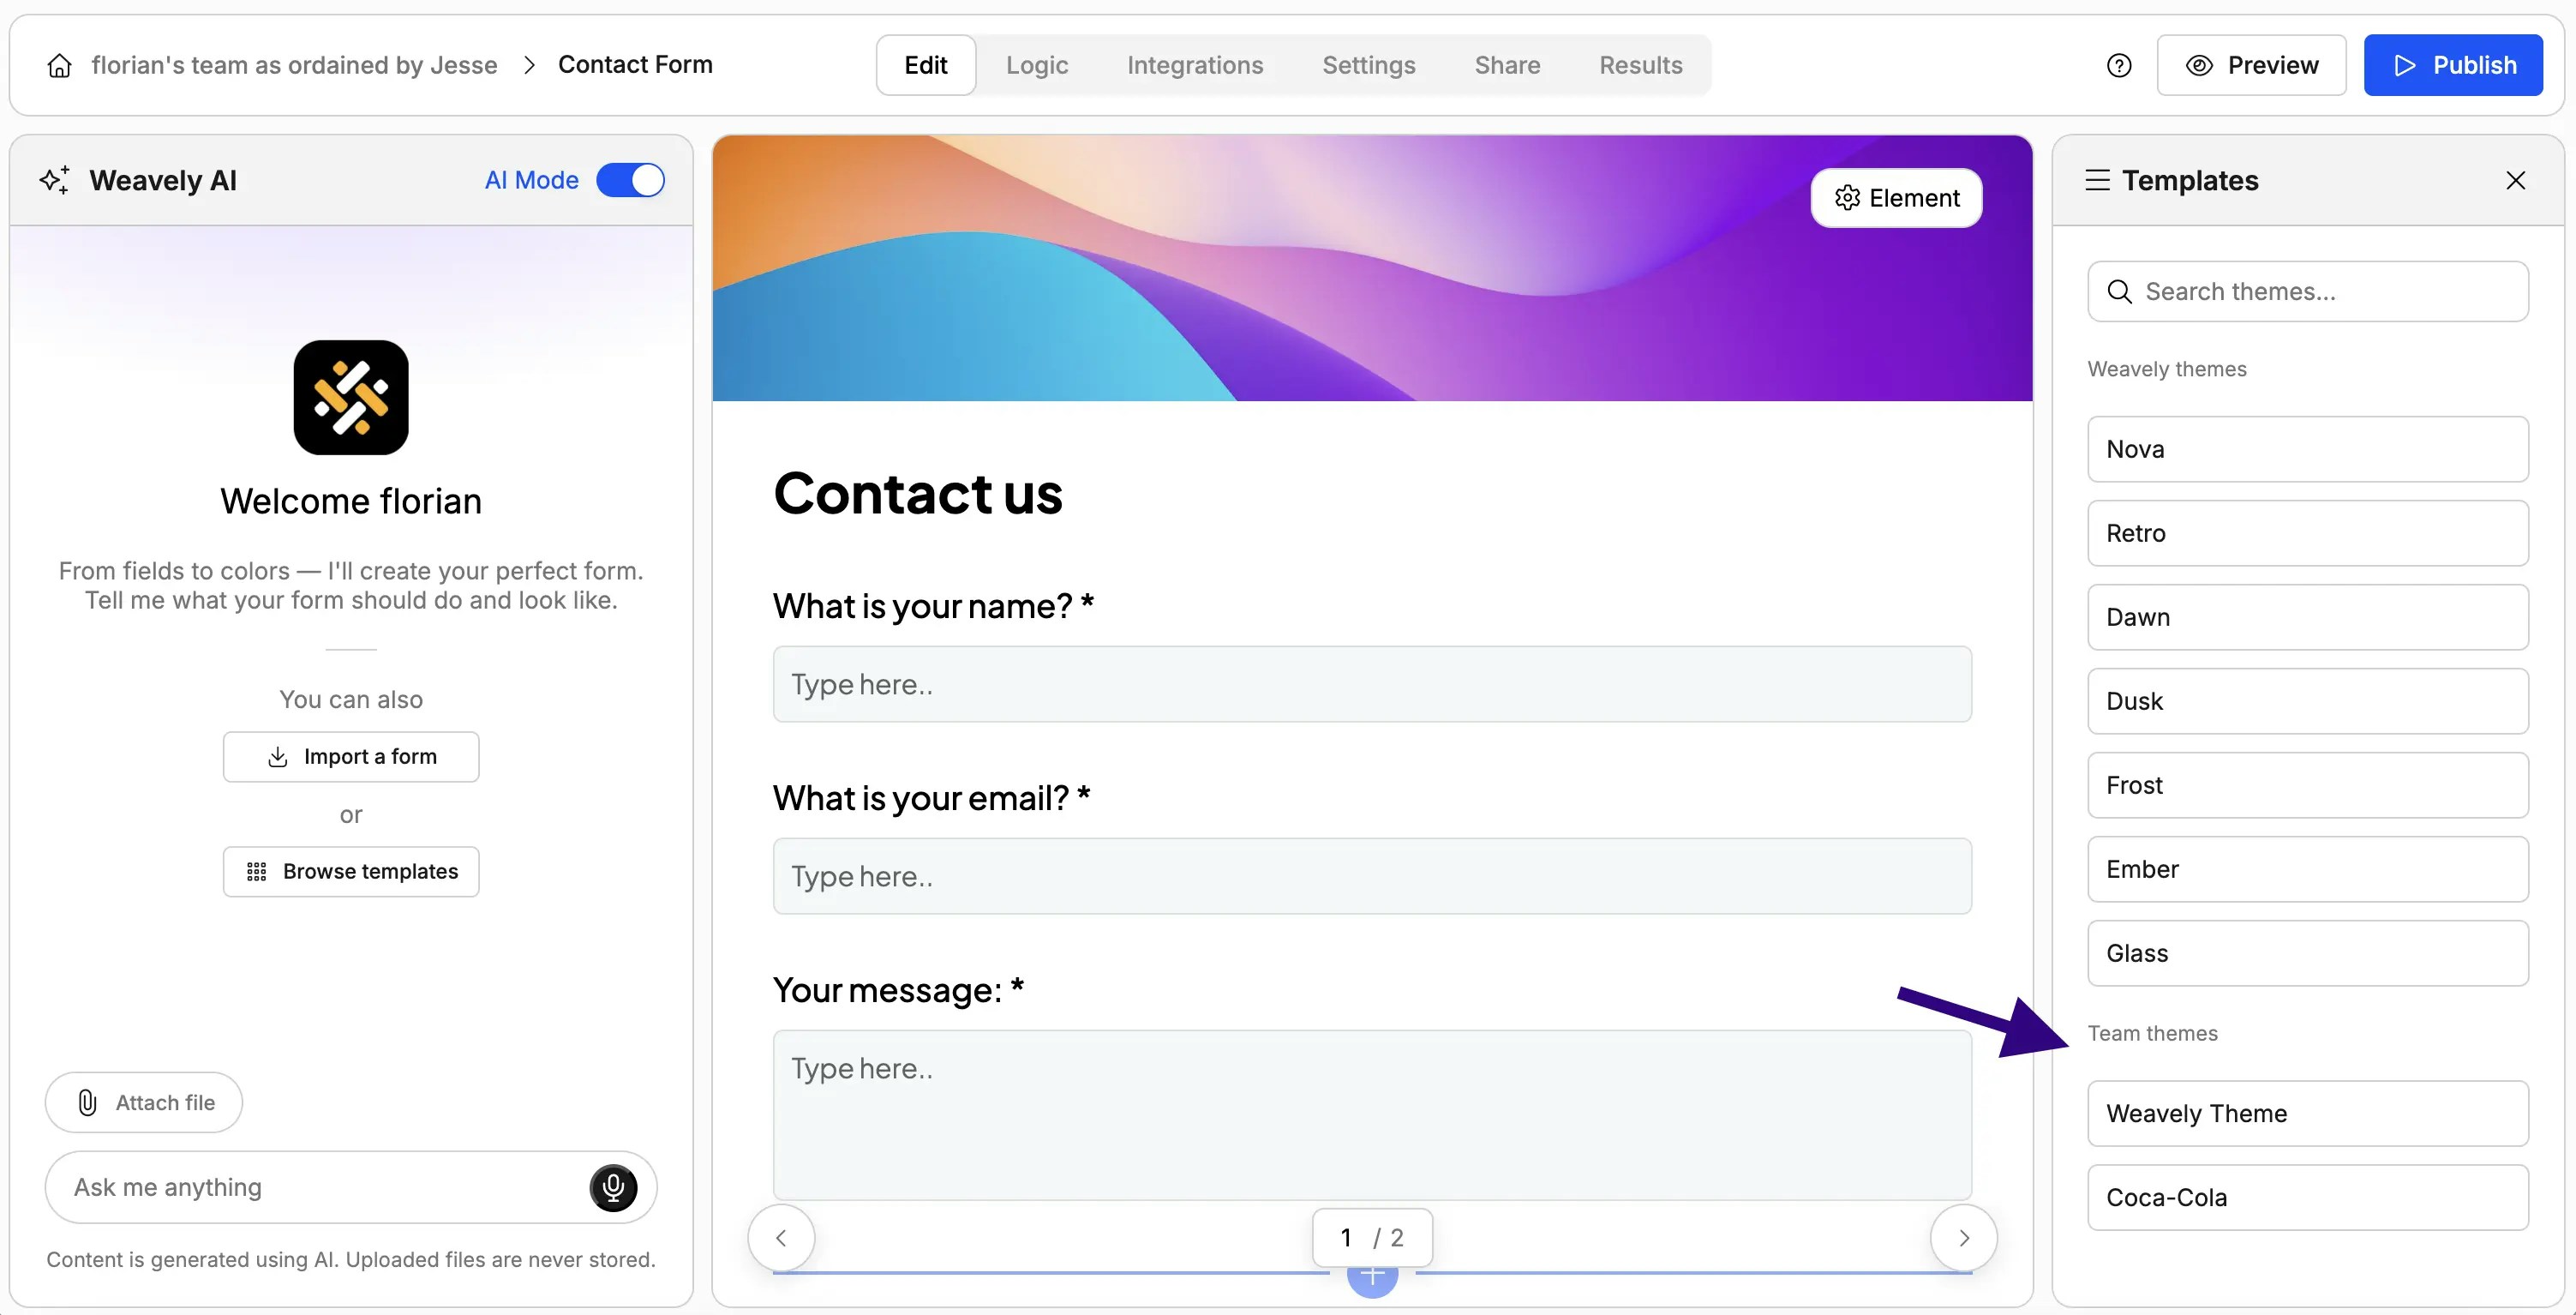
Applying Themes to Forms
When creating or editing a form:- Open the styling panel
- Look for the Templates section
- Select any of your saved themes
Collaboration Notes
All team members have access to account-wide themes. Any theme created by one team member can be used by others in the same workspace.
Best Practices
- Use themes for consistency - If you’re creating multiple forms for the same brand, set up a theme once and reuse it
- Test on different devices - Preview your styled forms on both desktop and mobile to ensure they look good everywhere
- Keep logos readable - Make sure your logo size is appropriate for the form layout you’ve chosen
- Brand import works best with official domains - For accurate brand styling, use the company’s main website URL