Understanding Field Mapping
When you set up an integration, each column or field in your destination (e.g., a Notion database) will appear as a mappable field in Weavely. You can populate these fields in three ways:- Static text - Enter literal text that will be the same for every submission
- Form field data - Pull dynamic data from form submissions using the
@symbol - Combined values - Mix static text with form field data
Step 1: Set Up Your Integration
Navigate to the Integrations section of your form and select the third-party tool you want to connect (e.g., Notion, HubSpot, Salesforce). Once connected, select the specific database or destination where you want your form data to be sent. Weavely will then display all available fields from that destination.Step 2: Map Your Fields
For each field in your integration, you have several options:Option 1: Leave It Empty
If a field is optional in your destination system, you can leave it blank.Option 2: Enter Static Text
Type any text directly into the field. For example, you could always set a status field to"New Lead" for every submission.
Option 3: Use Form Field Data
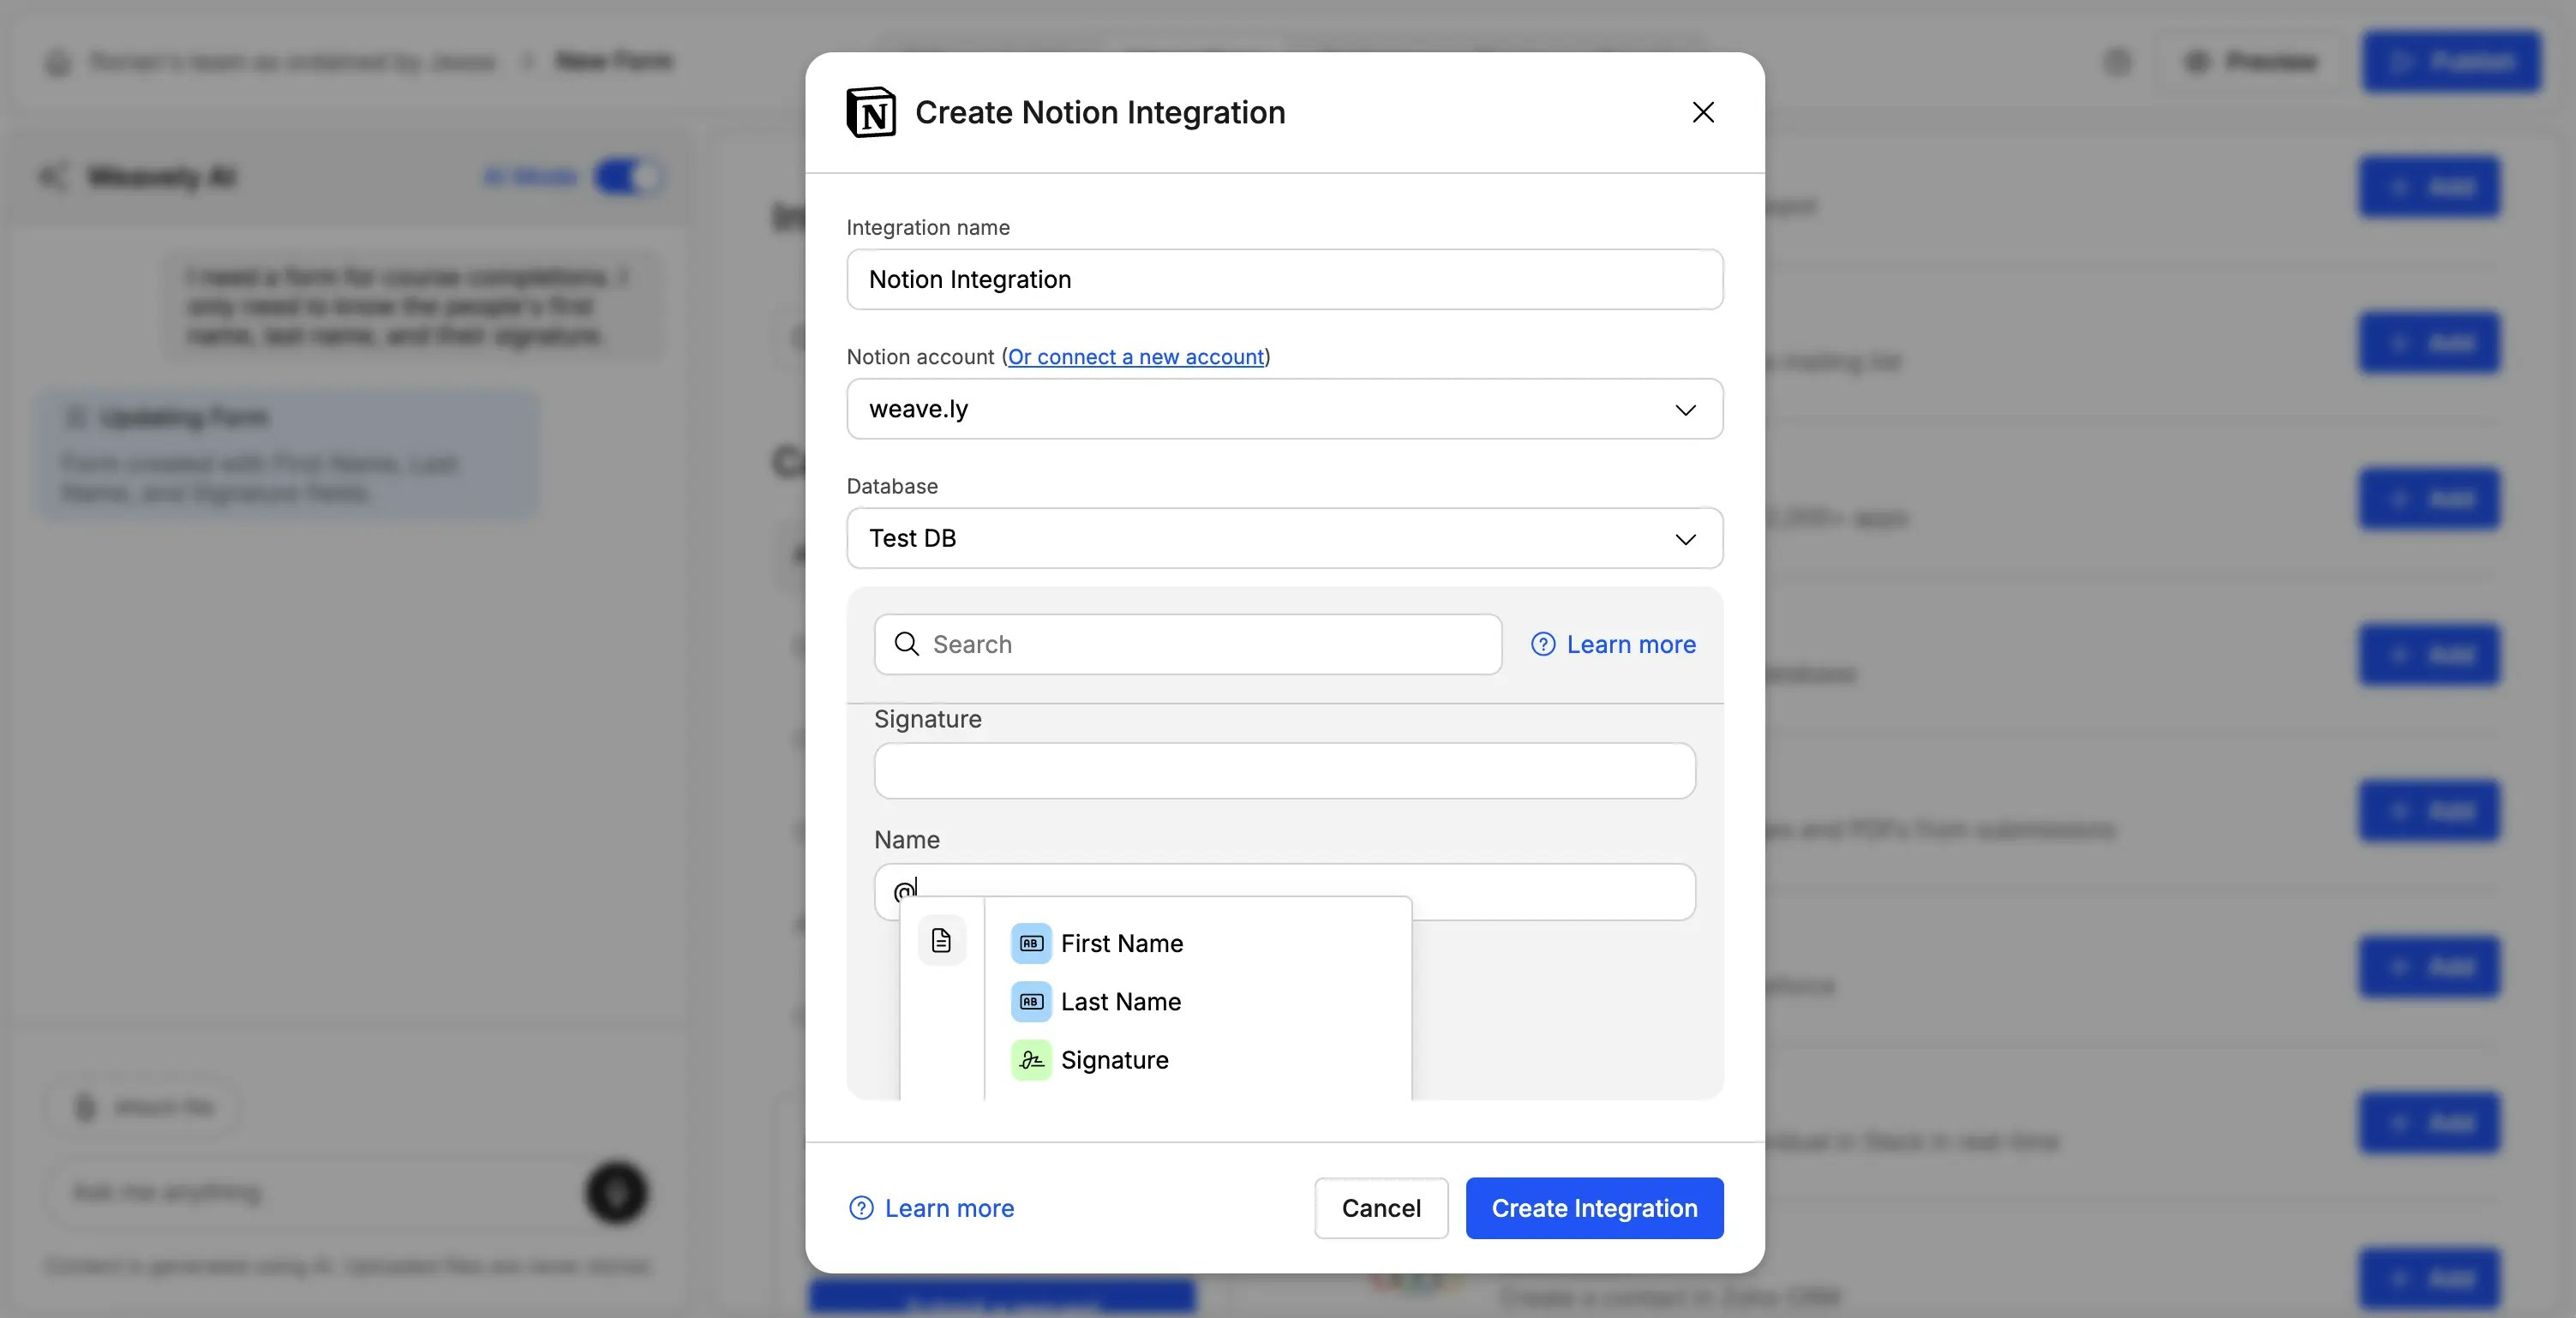
To insert dynamic data from your form:- Type the
@symbol - Select the form field you want to use from the dropdown menu
- The field reference will appear in the mapping
@First Name to populate it with the first name from each form submission.
Option 4: Combine Text and Form Fields
You can mix static text with form field data to create custom formatting. Example: To create a full name field formatted as “First / Last”:- Type
@and selectFirst Name - Type
/(or any separator you prefer) - Type
@again and selectLast Name
Step 3: Save Your Integration & Test it
Once you’ve mapped all required fields, click **Create Integration. **Submit a test entry through your form to verify that:- Data appears in your destination system correctly
- Field mappings are working as expected
- Any combined fields display the formatting you want