In this guide, we’ll walk you through how to connect a Weavely form to a Mailchimp list.
Open the Integrations Tab
Start by opening the form you want to connect in the Weavely editor. Head over to the Integrations tab, where you’ll see Mailchimp listed among the available integrations. Click Add.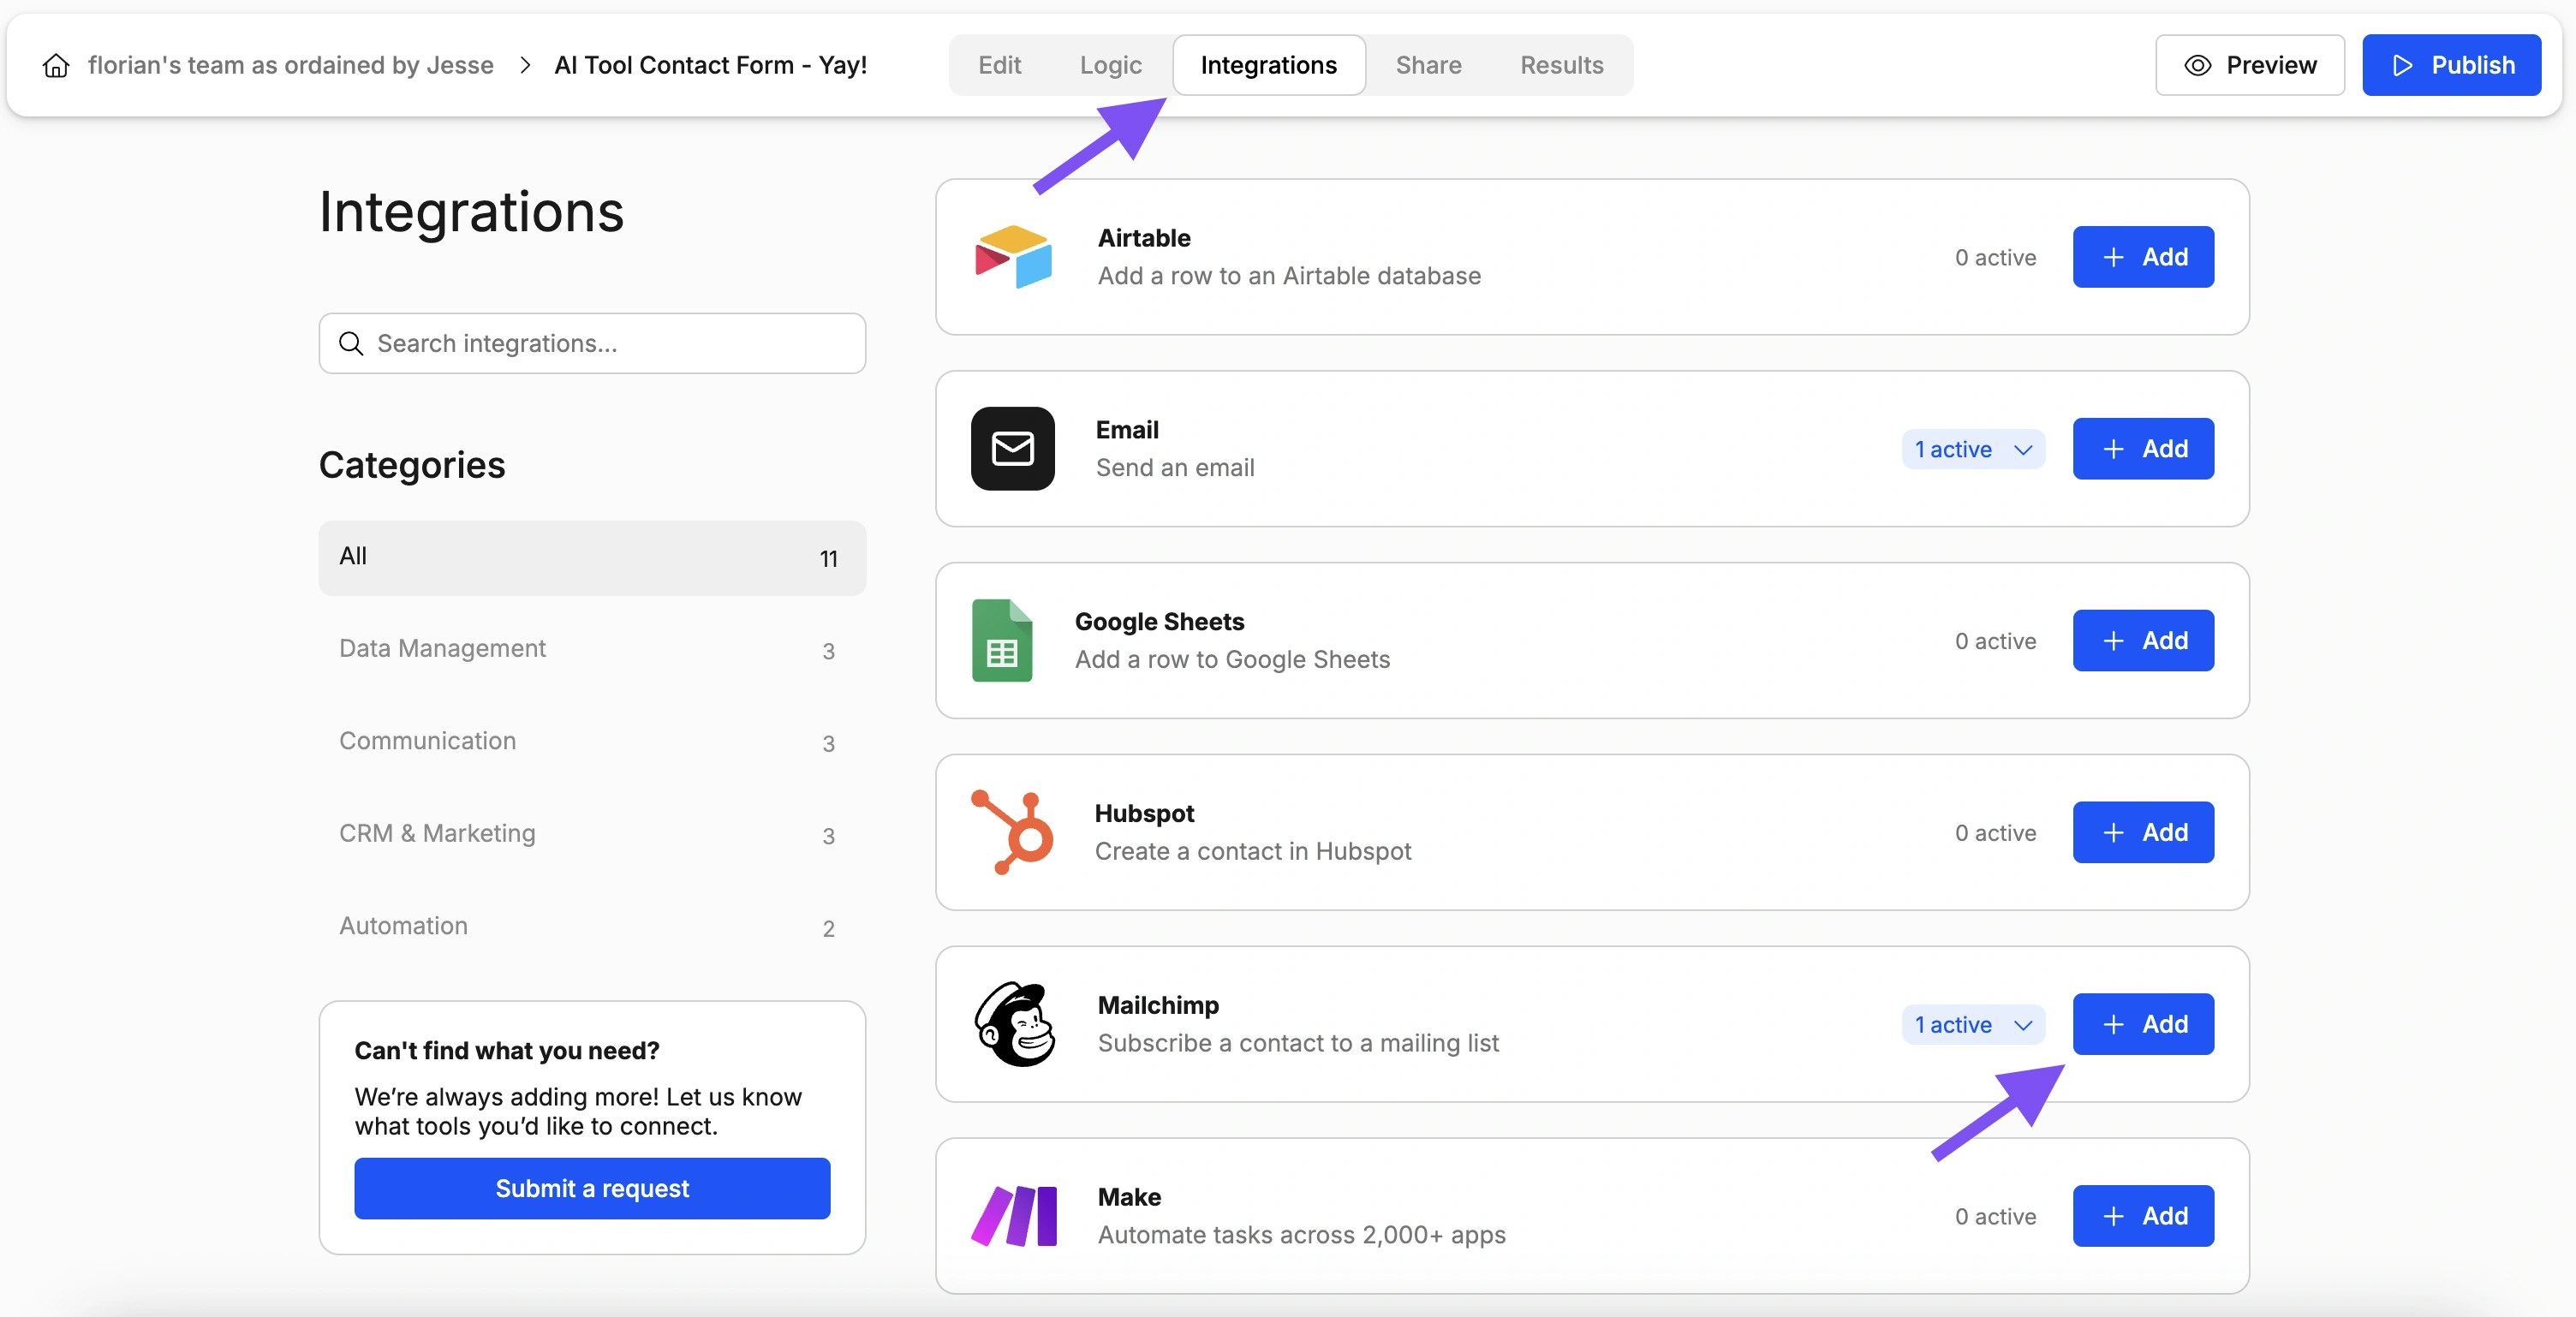
Connect Your Mailchimp Account
Next, you’ll be prompted to authorize the connection between your Weavely and Mailchimp accounts. Click the Connect button, which will redirect you to Mailchimp’s login page. After logging in, Mailchimp will ask whether you trust the application, go ahead and approve the authorization by clicking Allow. Once complete, you’ll be redirected back into Weavely, and your accounts will now be linked.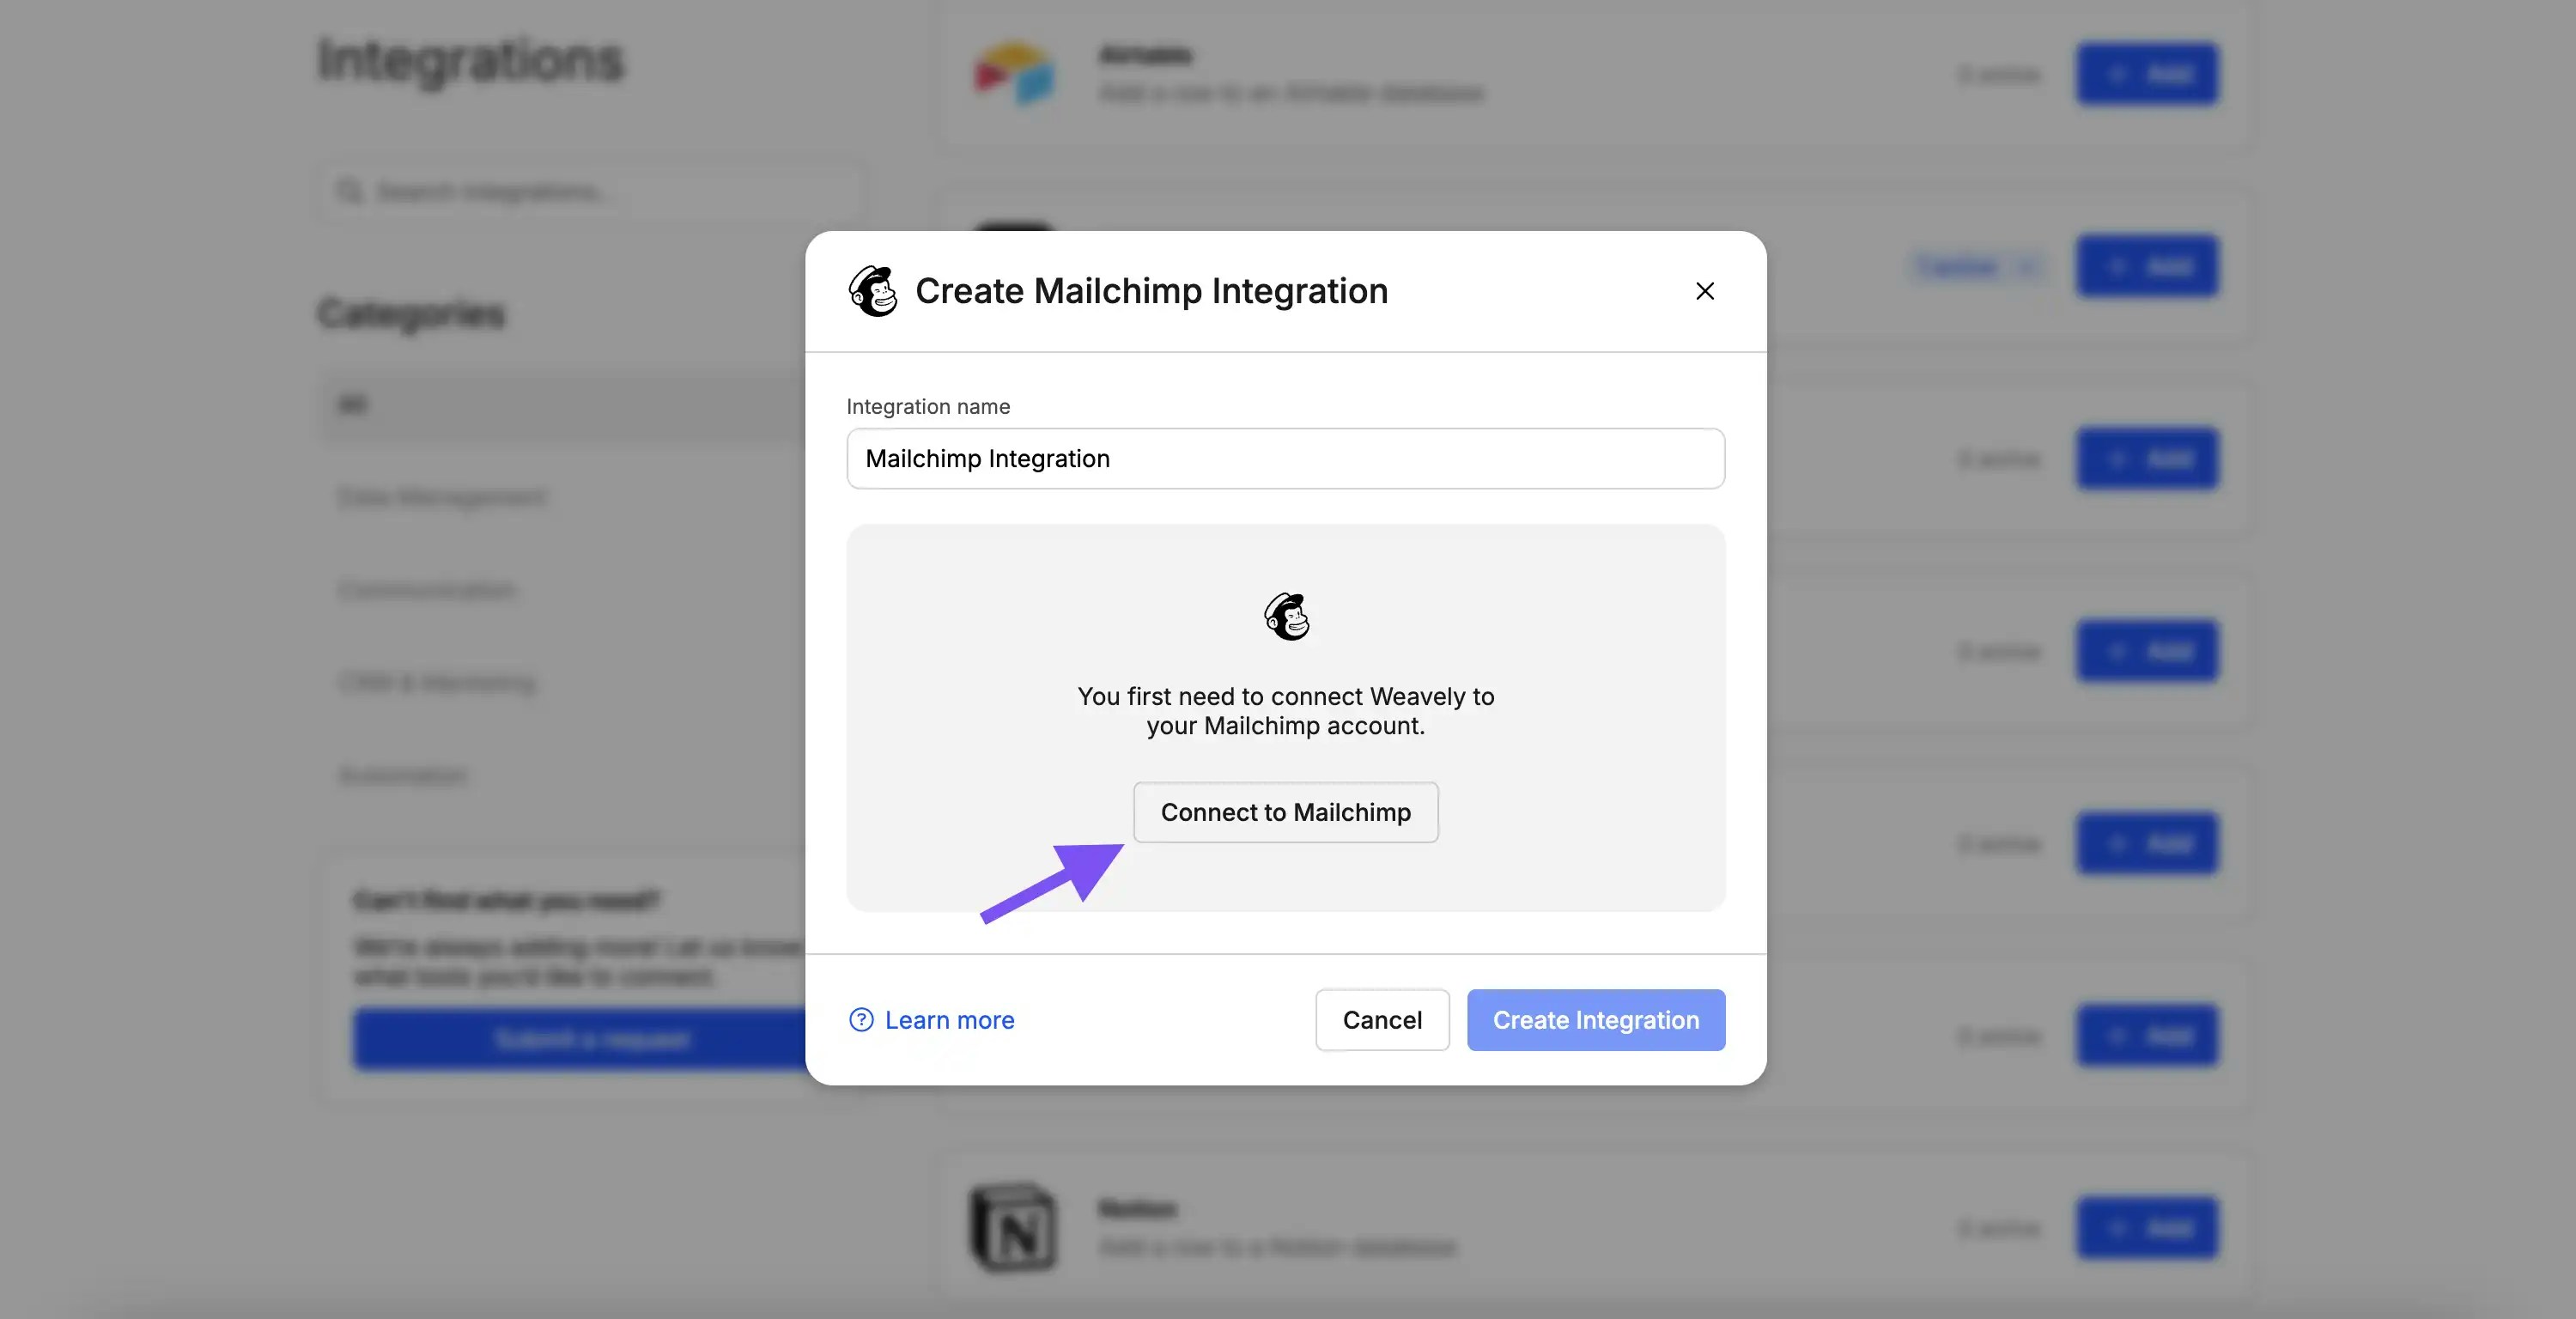
Choose the List and Email Field
With your Mailchimp account connected, you can now configure the integration by selecting which Mailchimp list should receive the new email addresses. If you only have one list, this step is straightforward. You’ll also be asked to select the appropriate email field from your form. This is particularly useful if your form contains multiple email inputs, as it ensures the correct one is used to create the contact in Mailchimp. Once you’ve made your selections, press Create Integration to finalize the setup.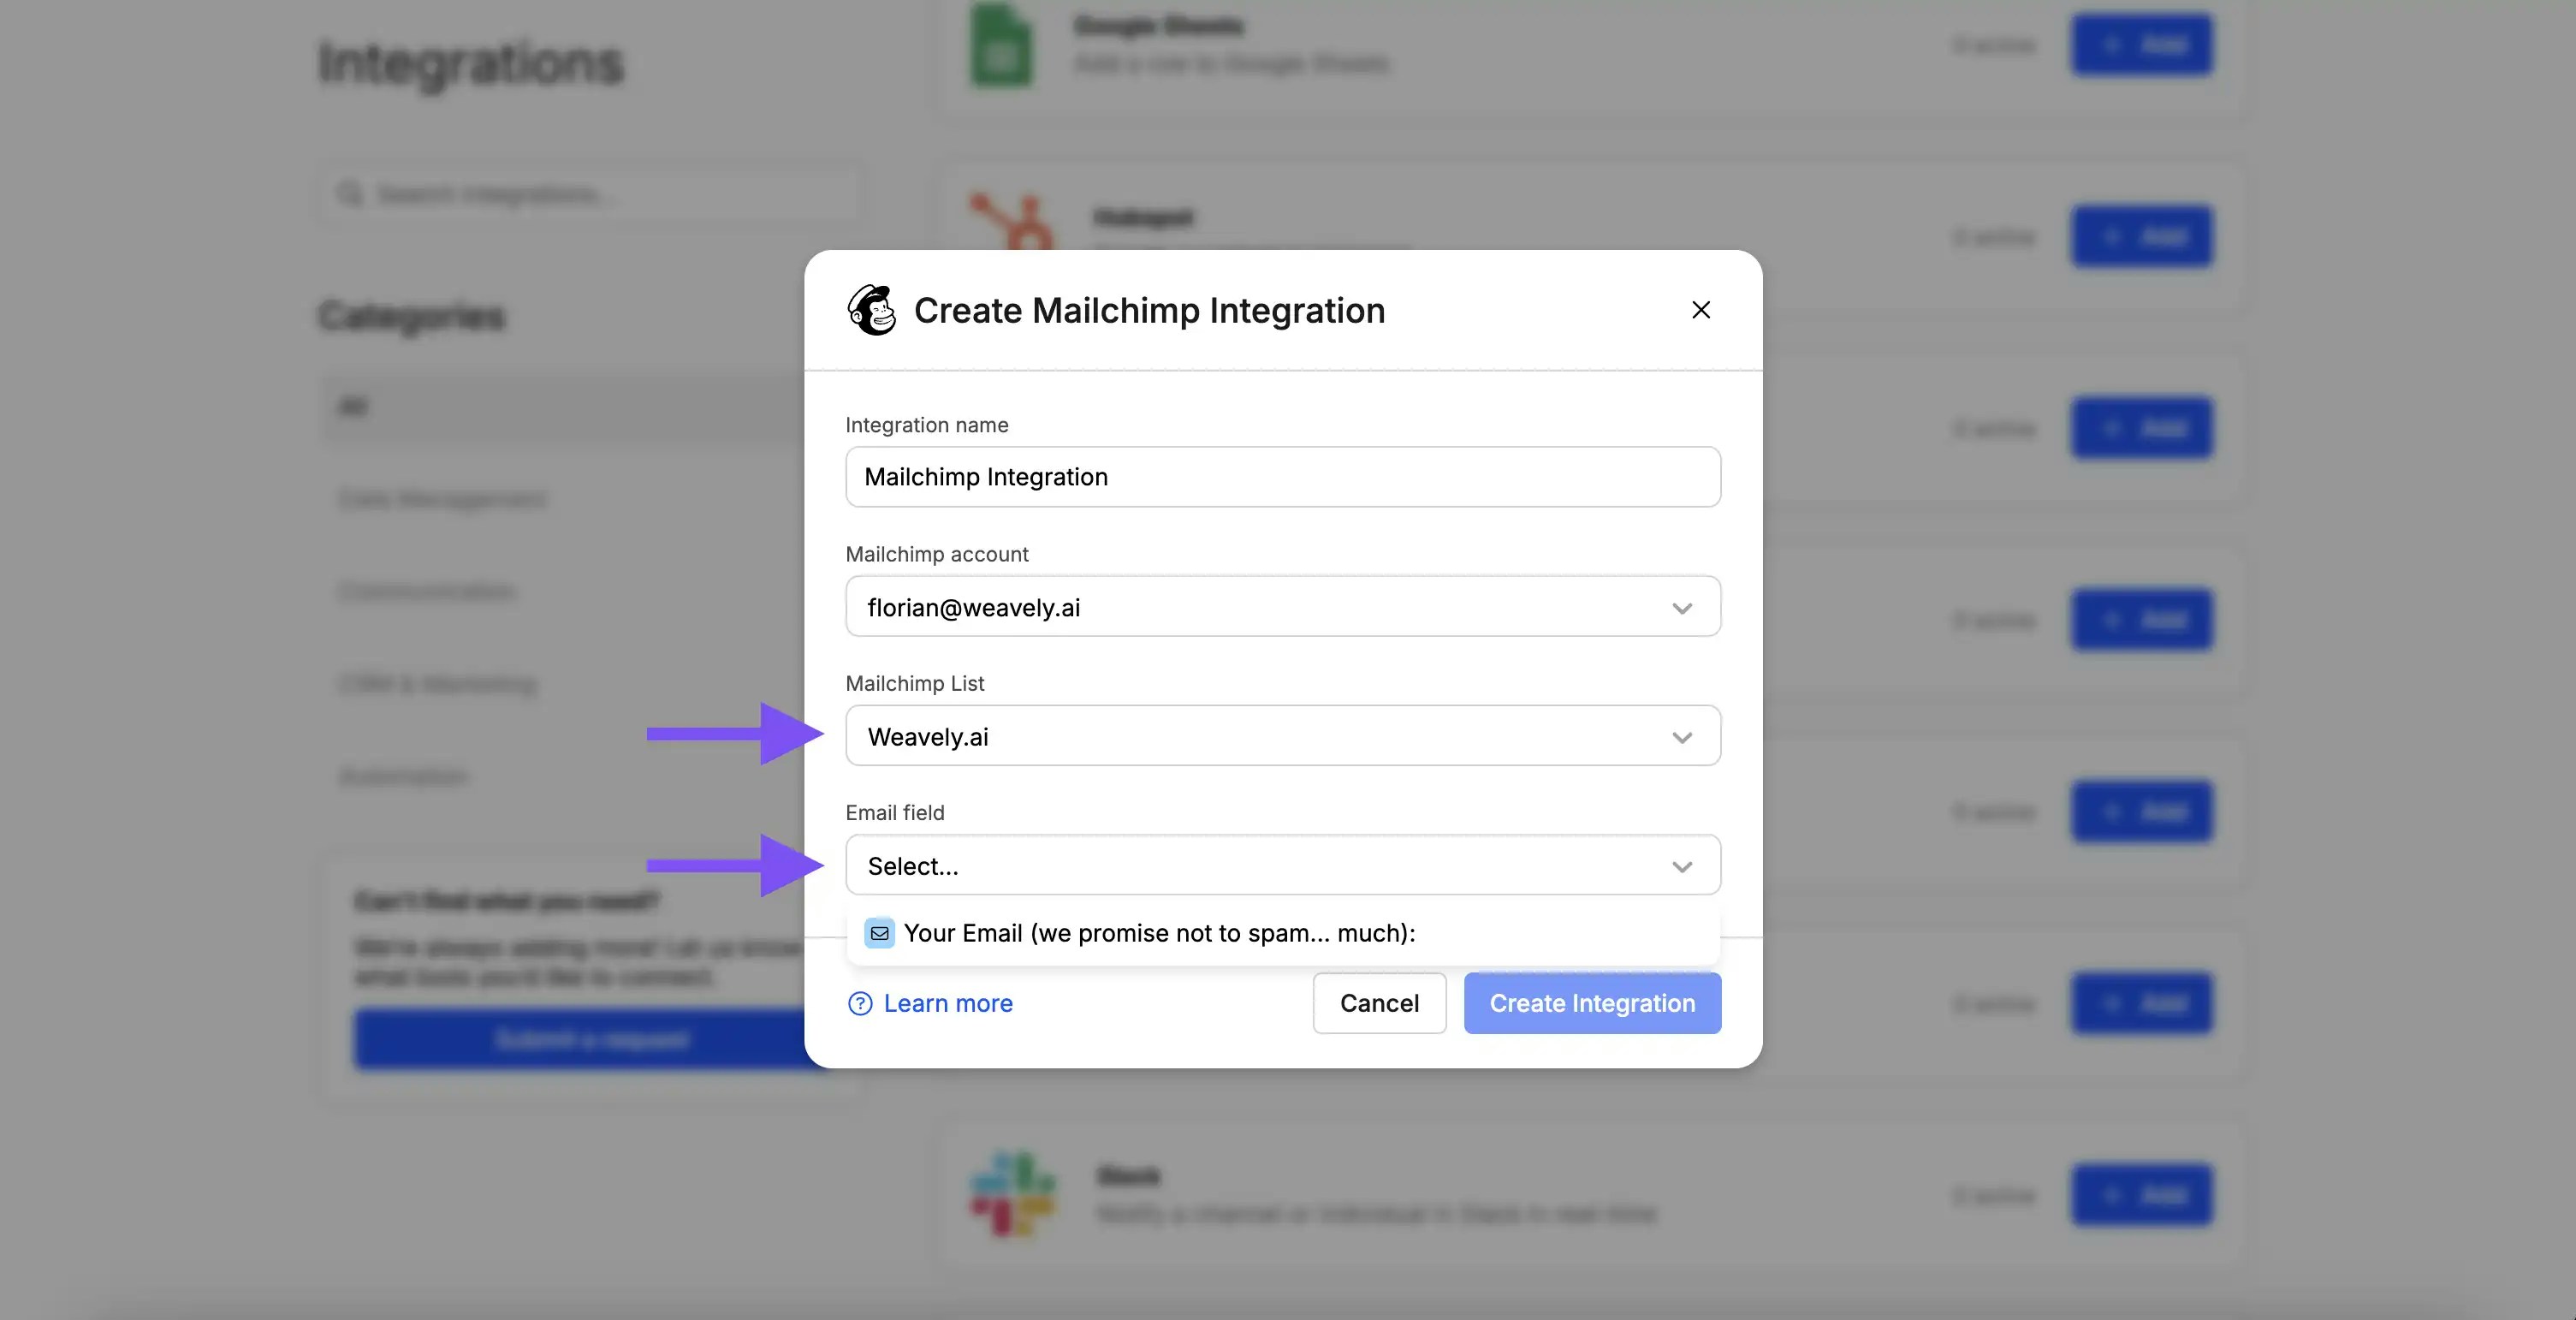
Changing Your Mailchimp Account or Resetting Your Connection
If you ever need to reset your connection with Mailchimp, for instance to switch to a different account or reauthorize access, you can do so from your Weavely dashboard. Go to Settings → Connected Accounts and click the red “Disconnect” button next to Mailchimp. You can then reconnect with the correct account.