Enable Community Nodes in n8n
Weavely connects to n8n through a verified community node. Before you can install it, you’ll need to enable community nodes in your n8n instance. Navigate to your Admin Panel and make sure Verified Community Nodes are enabled.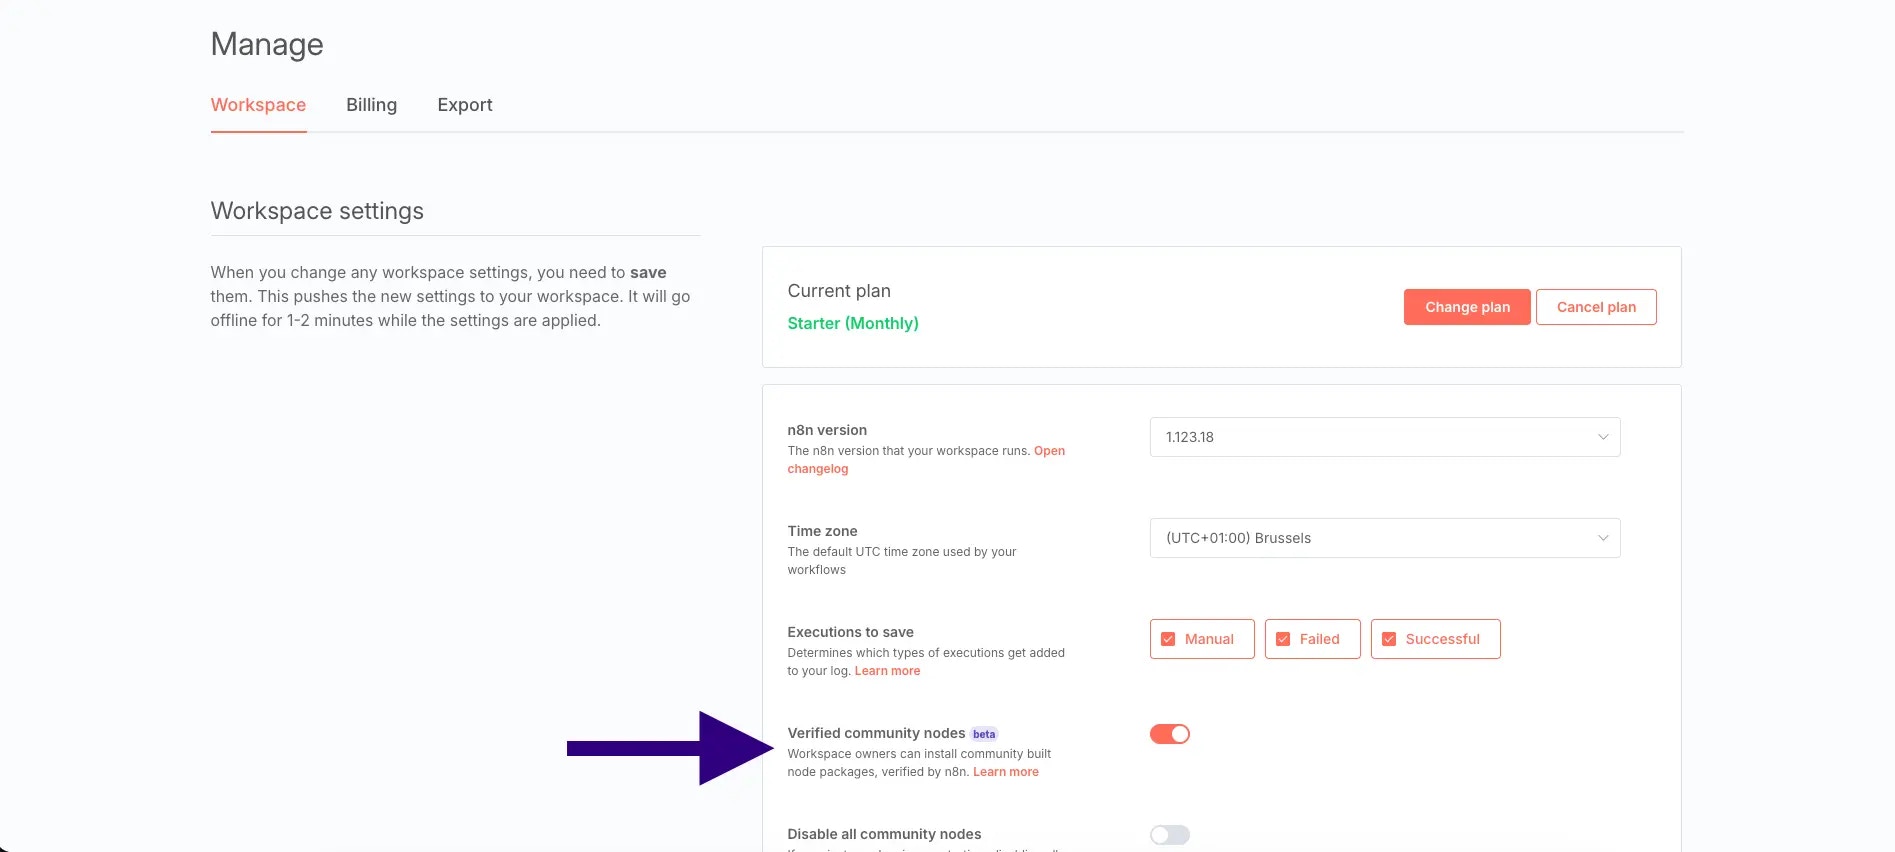
Generate a Personal Token in Weavely
You’ll need a “personal token” to connect your Weavely account to n8n. To create one, navigate to Settings->Personal Tokens in the Weavely dashboard, give your token a name (e.g. “n8n”), and click create. Once generated, copy the token — you’ll paste it into n8n in the next step.
Install the Weavely Node and Set Up Your Credentials
Create a new workflow in n8n and search for Weavely under the available triggers. Install the Weavely community node, then add it to your workflow. When prompted to set up credentials, paste the personal token you copied from Weavely and hit Save — n8n will test the connection to confirm everything is working.
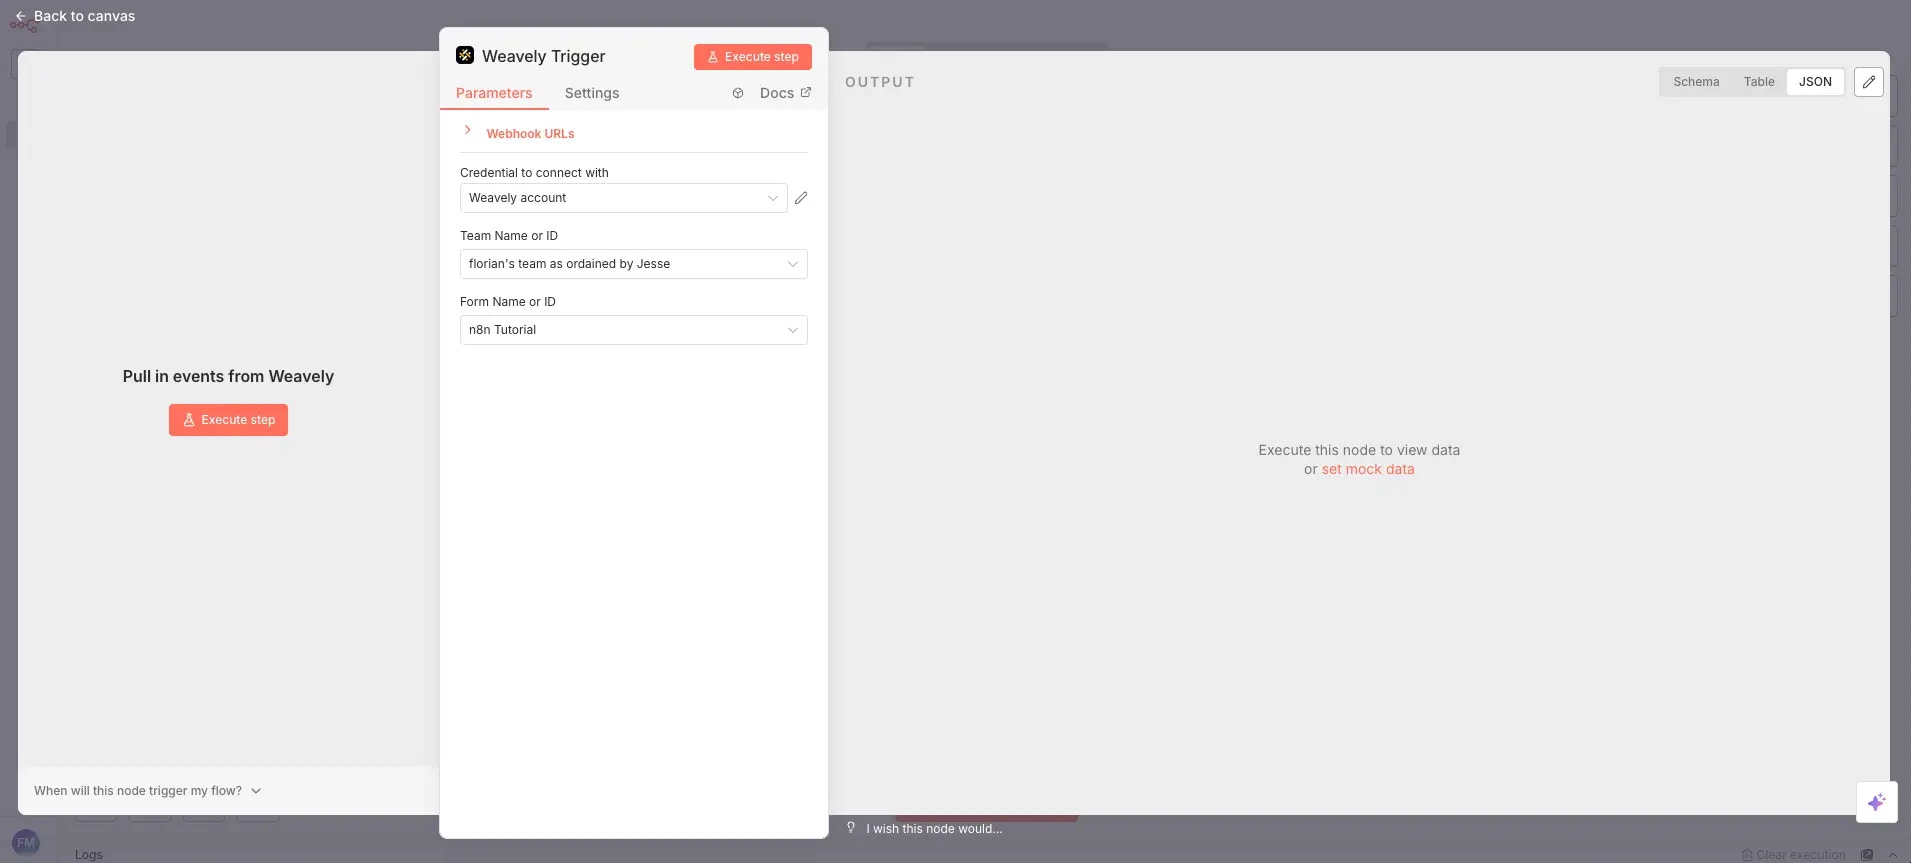
Select Your Team and Form
Once your credentials are saved, select the team you want to listen to and then choose the specific form you want to trigger the workflow. The form needs to be published in Weavely for it to appear in the dropdown. If you’ve just published a form, you may need to close and reopen the node settings for it to show up.When you press Execute Step, n8n will start listening for new submissions. Submit a test response to your form and you’ll see the output data in n8n — including the form ID, response ID, creation timestamp, and all your answers with their question labels, values, and question IDs.